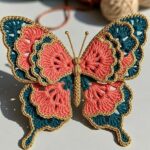
The stitch that looks like woven fabric and is much easier than it looks.
The Technique I Kept Putting Off
I avoided Tunisian crochet for longer than I care to admit. That long hook, the loops sitting on the hook all at once, the fabric that somehow resembles both knitting and weaving without being either — it looked complicated from a distance and I kept telling myself I would learn it later.
Later finally came, and I wish it had come sooner.
The first few rows feel unfamiliar in the way that anything new feels unfamiliar. But by the fifth row something clicks, and by the tenth you are working on autopilot while the fabric grows steadily beneath your hands. The two-pass rhythm — picking up loops across the row, then releasing them on the return — becomes almost meditative once your hands understand it. And the result looks so much more impressive than the effort required to produce it that you will want to use this stitch on everything.
Before we get into the written instructions, here is a video tutorial that walks through the stitch visually. If you are new to Tunisian crochet, I recommend watching it through once before reading the steps below.
What You Need
Medium weight yarn in the color of your choice — approximately 600g. Choose something soft and smooth with good stitch definition. A Tunisian crochet hook sized to match your yarn label. For wider projects, an interchangeable Tunisian hook with a flexible cable extension makes managing the loops much easier. You will also need scissors and a tapestry needle for finishing.
Understanding the Two-Pass System
Every row of Tunisian crochet is worked in two passes and understanding this before you begin makes the whole stitch make sense immediately.
The forward pass moves from right to left across the row. You insert your hook into each stitch, pull up a loop, and leave every loop sitting on the hook. By the end of the forward pass you have loops across the entire hook — one for every stitch in the row.
The return pass moves from left to right, working back across those waiting loops. Yarn over and pull through the first loop, then yarn over and pull through two loops repeatedly until only one loop remains on the hook. That remaining loop becomes the first stitch of the next forward pass.
Those two passes together make one complete row. Once that rhythm is in your hands, Tunisian crochet is one of the most satisfying stitches you will ever work.
Starting Your Foundation Chain
Chain a number of stitches that is a multiple of two plus two extra stitches. Insert your hook into the second chain from the hook, pull up a loop and leave it on the hook. Work the same motion across every remaining chain, leaving every loop on the hook as you go until you reach the end of the row. Then work the return pass back across all loops until one loop remains.
Working the Body
For every row that follows, work the forward pass by inserting your hook under each vertical bar across the row, pulling up a loop and leaving it on the hook. Then work the return pass, removing one loop at a time until a single stitch remains. That is one complete row of Tunisian simple stitch.
Adding Increases (Optional)
For a rectangular finished piece, work increases at both the beginning and end of each row by adding extra stitches at each edge.
Stitch Variations (Optional)
Once you are comfortable with the basic stitch, try these popular variations using the same two-pass system. The honeycomb stitch, the Tunisian knit stitch, and the single Tunisian crochet stitch each produce a noticeably different surface texture without changing the fundamental rhythm of the work. Alternating colors between rows is another easy way to add creativity and personality to any project.
Building to Your Desired Length
Continue working forward and return passes until the piece reaches the size you want.
Adding a Border
Once the piece is the right size, work a simple border around the entire outer edge. Regular crochet stitches or Tunisian stitches both work well depending on the look you prefer.
Finishing
Cut the yarn leaving a generous tail. Draw the tail through the final stitch and pull firmly to close. Use your tapestry needle to weave all remaining ends securely through the fabric in two directions before trimming.