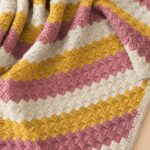
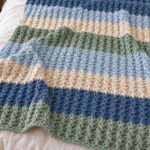
Big, bold raised blocks worked in groups of three — a bolder take on the classic waffle stitch that makes blankets, scarves, and cushion covers look like they came from a specialty yarn shop.
What Makes This Different From Regular Waffle Stitch
If you have worked the traditional waffle stitch before, you already know the basic idea: alternate regular double crochets with front post double crochets, switch their positions on the next row, and watch a grid of raised squares appear across the fabric.
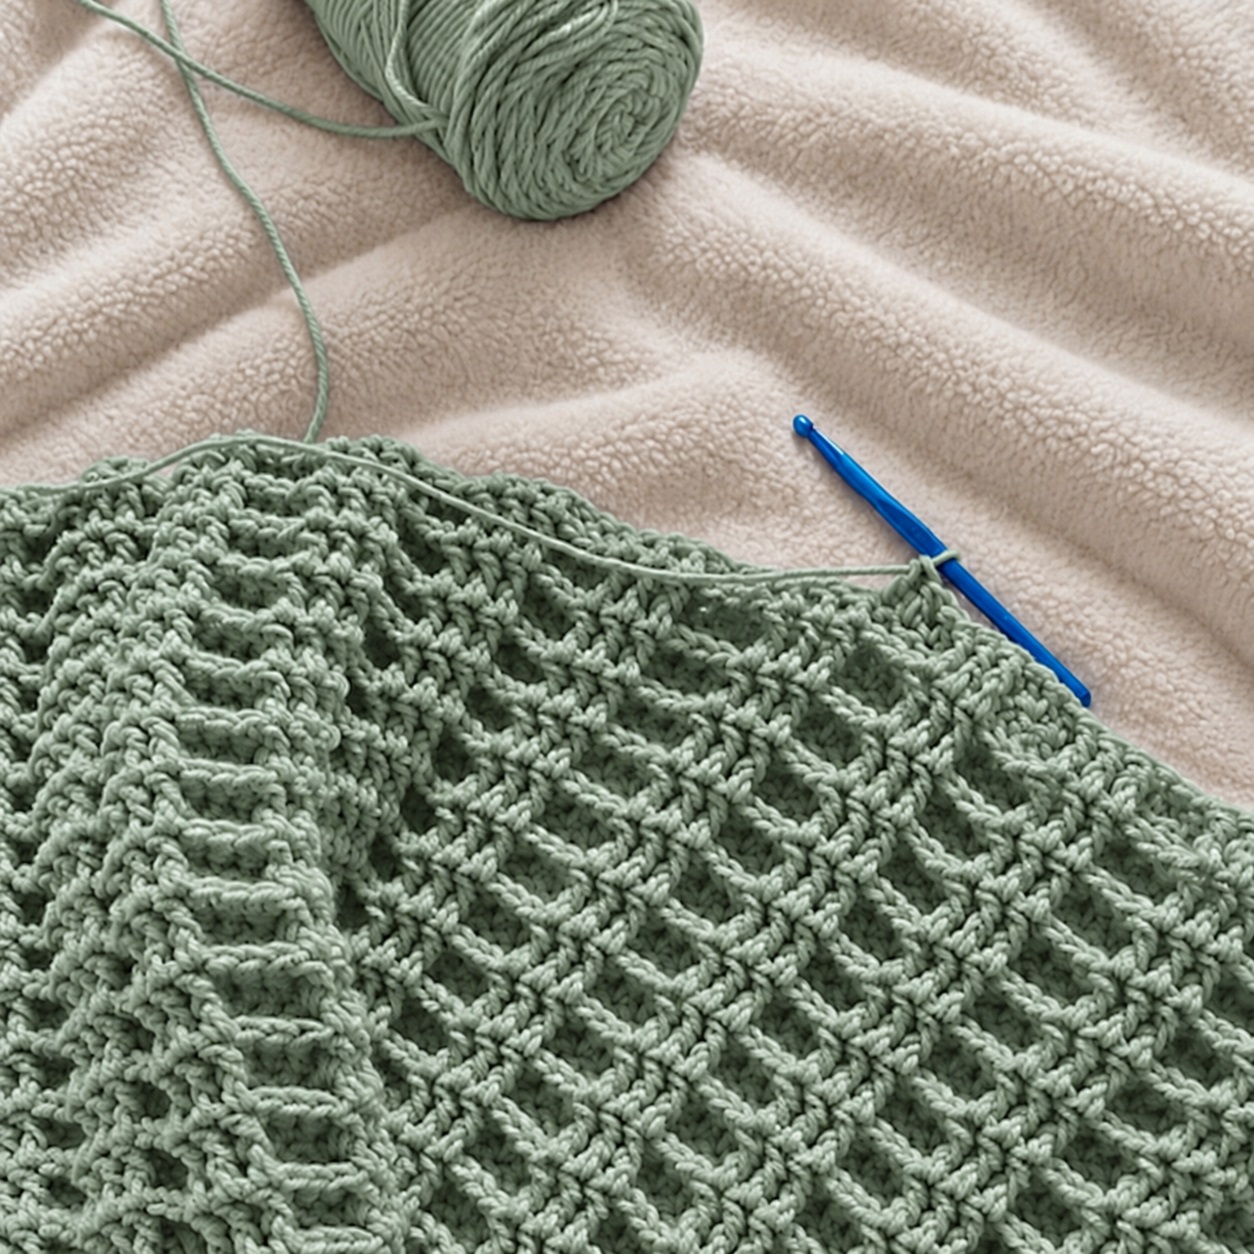
The 3×3 version takes that same logic and scales it up. Instead of working one stitch at a time, you work in groups of three. Three regular double crochets, three front post double crochets, three regular double crochets. On the next row those groups switch places. The result is a larger, bolder grid — waffle texture with noticeably more presence and weight than the standard version.
You may also see this stitch called the Triple Waffle Stitch or Waffle Grid Stitch in different crochet communities. All three names refer to the same construction.
Skill Level
Easy to intermediate. If you can work a double crochet and a front post double crochet, you can work this stitch. The front post double crochet is the only technique that might be new to you, and it is explained in full below before the pattern begins.
Materials
Any yarn and a corresponding hook. A smooth yarn is the best choice for this stitch because it allows the raised waffle blocks to stand out clearly against the flatter sections. A fluffy or loosely spun yarn tends to obscure the texture and flatten the visual contrast between the raised and regular sections.
The stitch naturally produces a dense, thick fabric because of the post stitches. If you want more drape — for a scarf or lightweight throw — move up one hook size from your yarn’s recommendation. If you want maximum structure and warmth — for a blanket, hot pad, or winter accessory — work at the recommended hook size or even one size down.
You will also need scissors and a yarn needle for finishing.
Abbreviations
ch — chain
dc — double crochet
FPdc — front post double crochet
st(s) — stitch(es)
rep — repeat
Special Stitch — Front Post Double Crochet
The FPdc is the stitch that creates the raised texture. Instead of inserting your hook through the top two loops of the stitch below, you insert it around the vertical post — the column of yarn — of that stitch.
Yarn over. Insert your hook from front to back and then back to front around the post of the indicated stitch. Yarn over and pull up a loop — 3 loops on hook. Yarn over and pull through 2 loops. Yarn over and pull through the remaining 2 loops. FPdc complete.
The hook going around the post rather than through the top loops is what pushes that stitch forward and creates the raised surface of the waffle grid.
Stitch Multiple
For the cleanest complete 3×3 repeat, begin with a multiple of 6 plus 5 chains.
Examples: chain 17, 23, 29, 35, 41.
After working Row 1, you will have a stitch count divisible into clean groups of 3 that begin and end with a complete block.
The Pattern
Foundation Chain
Chain a multiple of 6 plus 5. For a practice swatch, chain 17.
Row 1
Double crochet in the 3rd chain from the hook. Double crochet in each remaining chain across. Turn. The skipped chain-2 does not count as a stitch. For the 17-chain sample you will have 15 dc.
Row 2
Chain 2 — does not count as a stitch. Work 3 dc in the first 3 stitches. Work 3 FPdc around each of the next 3 stitches. Work 3 dc in the next 3 stitches. Repeat this sequence across the row. Turn.
For a 15-stitch swatch the row reads: 3 dc — 3 FPdc — 3 dc — 3 FPdc — 3 dc.
Row 3
Chain 2 — does not count as a stitch. Work 3 FPdc around each of the first 3 stitches. Work 3 dc in the next 3 stitches. Work 3 FPdc around each of the next 3 stitches. Repeat across. Turn.
For a 15-stitch swatch the row reads: 3 FPdc — 3 dc — 3 FPdc — 3 dc — 3 FPdc.
This row reverses the block placement from Row 2. The groups that were raised are now flat, and the groups that were flat are now raised. That reversal is what builds the checkerboard-style waffle grid as the rows accumulate.
Row 4
Repeat Row 2.
Row 5
Repeat Row 3.
Pattern Repeat
Continue alternating Row 2 and Row 3 until the piece reaches your desired length. That is the entire repeat — two rows, alternating, for as long as you want to keep going.
Understanding the 3×3 Grid
The name refers directly to the group size. Every section of this stitch is exactly 3 stitches wide. One row places the raised sections here. The next row places them there. After four or five rows the grid becomes clearly visible — raised squares sitting in a regular checkerboard arrangement across the surface of the fabric.
Once you start thinking about the fabric in terms of blocks of three rather than individual stitches, the pattern becomes very easy to follow without counting every stitch. Three flat, three raised, three flat — across the row, then switch. That mental shift from individual stitches to groups of three is the moment the stitch stops feeling like work.
Adjusting the Width
To make the project wider, add 3 chains to your starting chain — or 6 chains for one complete additional repeat. The stitch count stays consistent on every row. Simply continue the alternating Row 2 and Row 3 sequence regardless of how wide the piece is.
Color Options
Working the entire stitch in one solid color lets the texture carry the whole visual weight of the piece — and it does so beautifully. Cream, oatmeal, sage green, dusty blue, and warm grey all show the 3×3 grid with particular clarity because nothing competes with the raised blocks for attention.
If you want the grid to be even more noticeable, change colors every two rows. The color shift aligns with the block reversal and makes each section of the grid read as a distinct unit. Complete the final yarn over of the last stitch in the current color with the new color, then continue normally on the following row.
Tips for Working This Stitch
Do not work the FPdc stitches too tightly. Post stitches naturally pull the fabric inward slightly, and tight tension makes that pull more pronounced — producing a piece that is narrower than your starting chain suggested and stiffer than it should be. Keep the post stitches at a relaxed, consistent tension and the fabric will lie much better.
Keep the chain-2 turning chain loose enough to reach the height of the first double crochet comfortably. A tight turning chain pulls the edge in and makes the first stitch of every row harder to work into.
Think in blocks of three from the very first row. Counting 3 and 3 and 3 across the row is significantly less tiring than counting every individual stitch, and it makes it much easier to spot a mistake before it becomes several rows of a problem.
Work a swatch of at least 6 rows before beginning any large project. The 3×3 grid only becomes fully visible after several rows, and a swatch lets you see the finished texture clearly, check your tension, and decide whether the hook size is giving you the drape and density you want.
What to Make With the 3×3 Waffle Stitch
The density and structure of this stitch make it particularly well suited to projects where warmth and texture are both important. Blankets and throws are the most popular application — the bold grid reads well at large scale and the thick fabric has a satisfying weight. Scarves and cowls worked at a slightly looser tension have a softer, more drapey quality while still showing the grid clearly. Cushion covers benefit from the natural structure of the stitch, which helps them hold their shape without additional stuffing support.
Hot pads and trivets worked in cotton yarn are another practical use — the density of the waffle fabric provides good insulation, and the textured surface gives a comfortable grip. Hats and winter accessories worked in a heavier yarn weight produce a thick, warm result that shows the grid at a smaller, more delicate scale.
Final Thoughts
The 3×3 Waffle Stitch is straightforward to learn, easy to memorize, and produces a finished fabric that looks considered and carefully made. The two-row repeat means you are never tracking a complex sequence, and the block structure means you are never counting dozens of individual stitches across a long row.
Pick up a hook, chain 17, and work through five rows. By the time those first waffle blocks appear you will already be planning what to make with it.