One small tile at a time, growing diagonally from corner to corner — this is the crochet technique that looks complicated, works up surprisingly fast, and produces a fabric so satisfying you will want to make everything this way.
The Blanket That Changed the Way I Think About Crochet
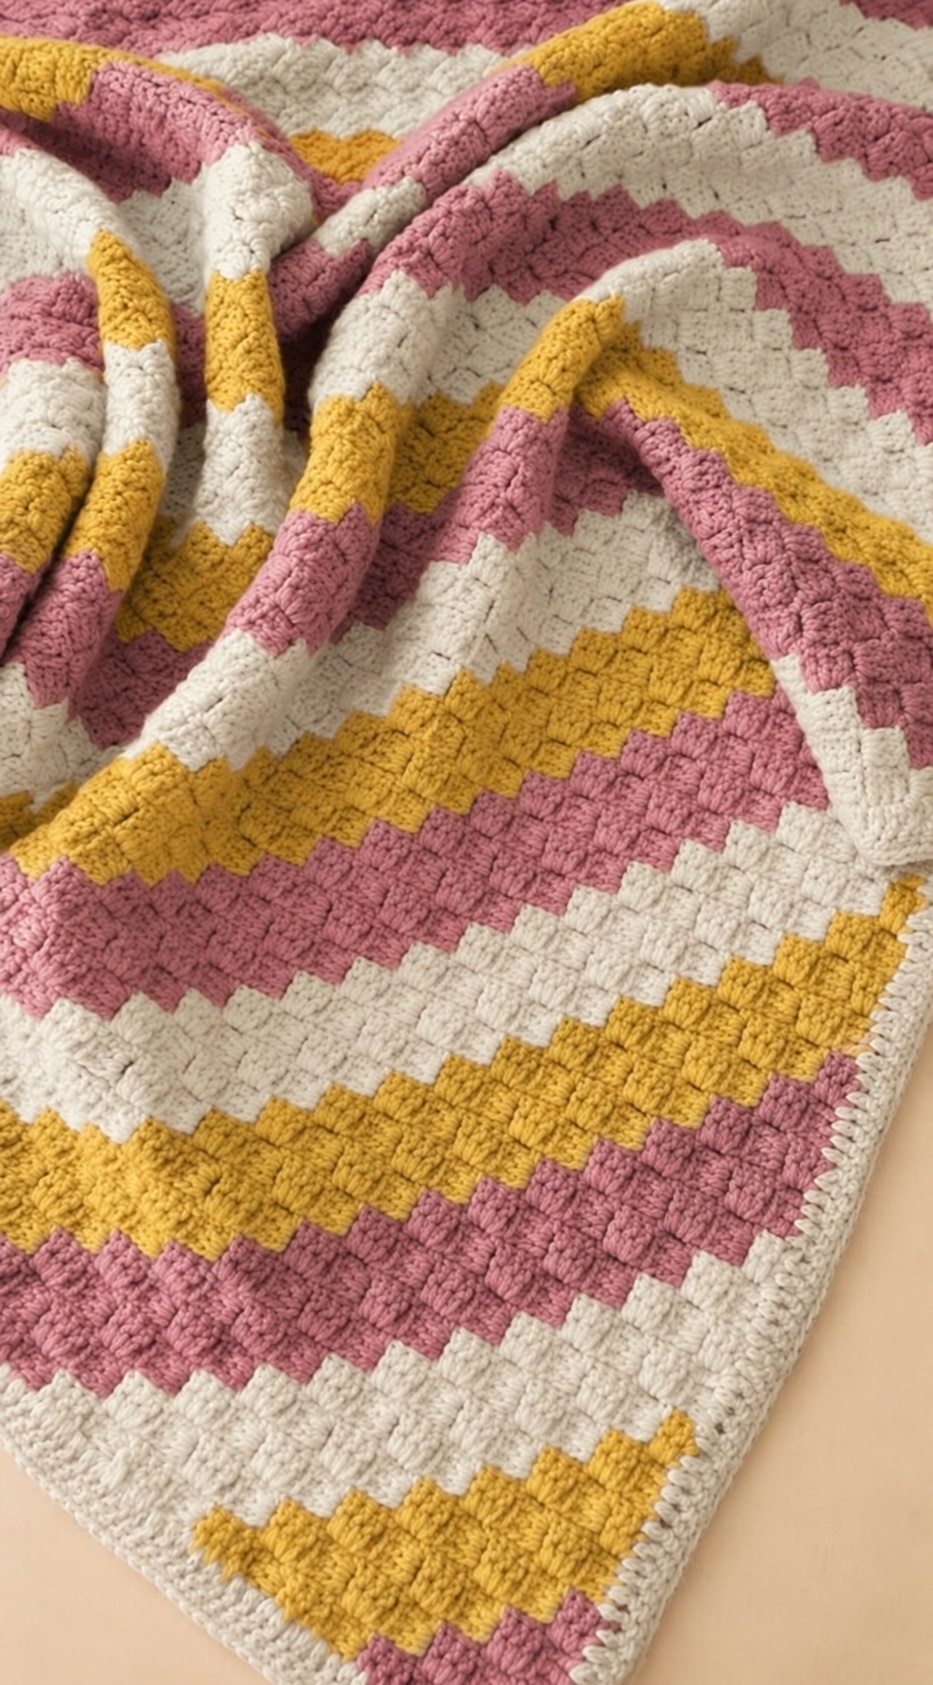
I remember the first time I saw a corner to corner blanket in person. Someone had brought one to a craft fair — a bold diagonal stripe design in deep teal and warm mustard — and I stood in front of it for an embarrassingly long time trying to figure out how it was constructed. The fabric had this beautiful woven, almost quilted quality that I had never seen in a crocheted piece before. It looked structured and deliberate and somehow completely different from anything I had made.
When I finally sat down and learned C2C, I could not believe how simple the foundation actually was. Every single tile in that blanket — every square in that woven grid — was just three double crochets on a little chain. That was it. The entire effect came from building those tiny tiles diagonally, one at a time, starting in one corner and growing outward until the blanket reached the right size, then decreasing back down to the opposite corner.
Once that construction clicked in my mind, I made four C2C blankets in a row. I am not exaggerating.
This tutorial walks you through the complete pattern from your very first tile to your finished blanket, with everything you need to understand how the tiles work, how to plan your size, and how to add a clean border at the end.
What You Need to Know Before Starting
This pattern is rated easy. You need to be comfortable with chains, slip stitches, and double crochet. The only genuinely new element is the way each tile connects to the one below it — and that connection is explained in detail in the pattern notes and the row instructions. Give yourself a few rows of patience at the beginning. Once you see how each new tile hooks onto the previous row, the whole construction becomes one of the most rhythmic and relaxing things you will ever crochet.
Materials
Worsted weight (#4) yarn in your chosen color or colors. How much you need depends on the finished size of your blanket — buy a little extra from the same dye lot for each color, particularly if you are planning stripes or color blocks where running out mid-section would be genuinely frustrating.
A 5.0 mm (H-8) or 5.5 mm (I-9) crochet hook, or the size recommended on your yarn label. You will also need a measuring tape, scissors, and a tapestry needle for weaving in ends. Stitch markers are optional but helpful if you are working with multiple colors.
Abbreviations
ch — chain
sl st — slip stitch
sc — single crochet
dc — double crochet
st(s) — stitch(es)
sp(s) — space(s)
How the Tiles Work
Before diving into the rows, it is worth taking a moment to understand the tile itself — because once you understand it, everything else in the pattern makes immediate sense.
Every tile in a C2C blanket is made of a chain-3 and 3 double crochets. The chain-3 forms a small space on the side of the tile — called the chain-3 space — and that space is what the next row hooks onto. When you are growing the blanket, you add one brand new tile at the start of each row. When you are decreasing, you slip stitch across the top of the last tile instead of making a new one and leave the final space of the row without a tile.
That is the entire construction. Everything else is simply repetition.
Pattern Notes
You turn at the end of every row. The row number equals the number of tiles in that row while the blanket is growing — Row 1 has 1 tile, Row 2 has 2 tiles, Row 3 has 3 tiles, and so on. For a square blanket, the number of tiles along each edge equals the number of your last increase row. To change color cleanly, work the last yarn over of the last double crochet of a row with the new color before turning.
The Pattern
Growing the Blanket — Increase Rows
Row 1: Chain 6. Double crochet in the 4th chain from the hook and in each of the next 2 chains. You have 1 tile.
Row 2: Chain 6, turn. Double crochet in the 4th chain from the hook and in each of the next 2 chains — this is your new tile. Slip stitch into the chain-3 space of the tile from Row 1. Chain 3. Work 3 double crochets into that same chain-3 space. You have 2 tiles.
Row 3 and every increase row after: Chain 6, turn. Double crochet in the 4th chain from the hook and in each of the next 2 chains — new tile made. Slip stitch into the chain-3 space of the next tile from the row below. Chain 3. Work 3 double crochets into that same space. Repeat across the row. You end up with one more tile than the previous row.
Continue working increase rows until the edges of your blanket have as many tiles as you want. For a blanket with 40 tiles along each side, work 40 increase rows.
Shrinking the Blanket — Decrease Rows
Every decrease row: Turn. Slip stitch into each of the first 3 double crochets and then slip stitch into the chain-3 space. Chain 3 and work 3 double crochets into that same chain-3 space. Slip stitch into the chain-3 space of the next tile. Chain 3. Work 3 double crochets into that same space. Repeat across until one tile from the previous row remains. Slip stitch into the chain-3 space of that final tile but do not make a new tile on it. You end up with one fewer tile than the previous row.
Continue working decrease rows until only 1 tile remains. Fasten off.
Planning Your Blanket Size
Before committing to a full blanket, work a small practice piece of about 8 increase rows. Lay it flat and measure along one straight diagonal edge, then divide that measurement by 8 to find the length of one tile. Divide the width you want for your finished blanket by that number to find out how many tiles each side needs.
A lap blanket is typically around 36 by 48 inches. A baby blanket usually sits between 30 and 36 inches wide. For a square blanket, simply increase until you reach your tile count and then decrease back down.
Quick reference for common blanket sizes:
| Blanket Type | Approximate Size | Approximate Tiles Per Side |
|---|---|---|
| Baby blanket | 30 x 36 inches | 30 to 36 tiles |
| Lap blanket | 36 x 48 inches | 36 to 48 tiles |
| Throw blanket | 50 x 60 inches | 50 to 60 tiles |
| Full size blanket | 60 x 80 inches | 60 to 80 tiles |
These are approximate figures based on average worsted weight tension. Always measure your own tile size before planning a large project.
Adding a Border
Round 1: Join yarn in any corner with the right side facing you. Chain 1. Work single crochet evenly around the entire perimeter, placing approximately 3 sc along the edge of each tile and 3 sc in each corner stitch. Join with a slip stitch to the first sc.
Round 2: Chain 1. Single crochet in each stitch around, working 3 sc into the center stitch of each corner group. Join and fasten off. Weave in all ends.
One round of border is often enough to give the edges a clean, finished appearance. For a wider border, simply continue working additional rounds of single crochet, always placing 3 sc in the center corner stitch on every round to keep the corners lying flat.
Tips for Happy Tiles
Chain 6 loosely at the start of every increase row. Tight chains pull the starting edge inward and make the blanket gradually narrow at the corner where it began.
If you lose your place during the increase section, count your tiles. While growing, each row always contains the same number of tiles as its row number. If Row 12 has 11 tiles instead of 12, you missed a tile somewhere in that row.
When decreasing, make sure you are slip stitching across the double crochet stitches and not into the chain spaces at the end of each row. Working into the chain spaces at the wrong point creates a lumpy, irregular edge that is difficult to correct later.
Keep a stitch marker in the first tile of every row if you are working stripes or color changes. It makes counting much easier and prevents you from losing track of which row you are on when you set the project down and pick it up again later.
Color Ideas and Variations
Diagonal stripes are one of the most natural and beautiful applications of C2C construction — simply change colors every two to four rows and the stripes run diagonally across the blanket automatically. No planning required, no carrying yarn across long rows. The diagonal nature of the construction does the work for you.
For a bold, modern look, work one half of the blanket in one color and switch to a second color for the other half. The color change runs diagonally across the center of the blanket and creates a striking two-tone design that looks carefully planned with almost no extra effort.
If you enjoy this technique and want to take it further, C2C graphs allow you to create pictures and text in your blanket — hearts, stars, initials, animals — one tile at a time, exactly like pixels on a screen. The same basic tile construction underpins the entire technique, so everything you learned making your first simple blanket translates directly into graphgan work.
Final Thoughts
Corner to corner crochet is one of those techniques that feels slightly unfamiliar for the first three or four rows and then clicks so completely that you wonder how you ever crocheted any other way. The tiles are simple. The construction is logical. The fabric is thick, squishy, and beautiful. And the diagonal growth means that every single row is visibly, satisfyingly different from the one before it — which makes this one of the most rewarding blankets to work on, row by row, all the way to the opposite corner.
Start small. Make a practice swatch. Count your tiles. And then settle in, because this is the kind of project you will not want to put down.