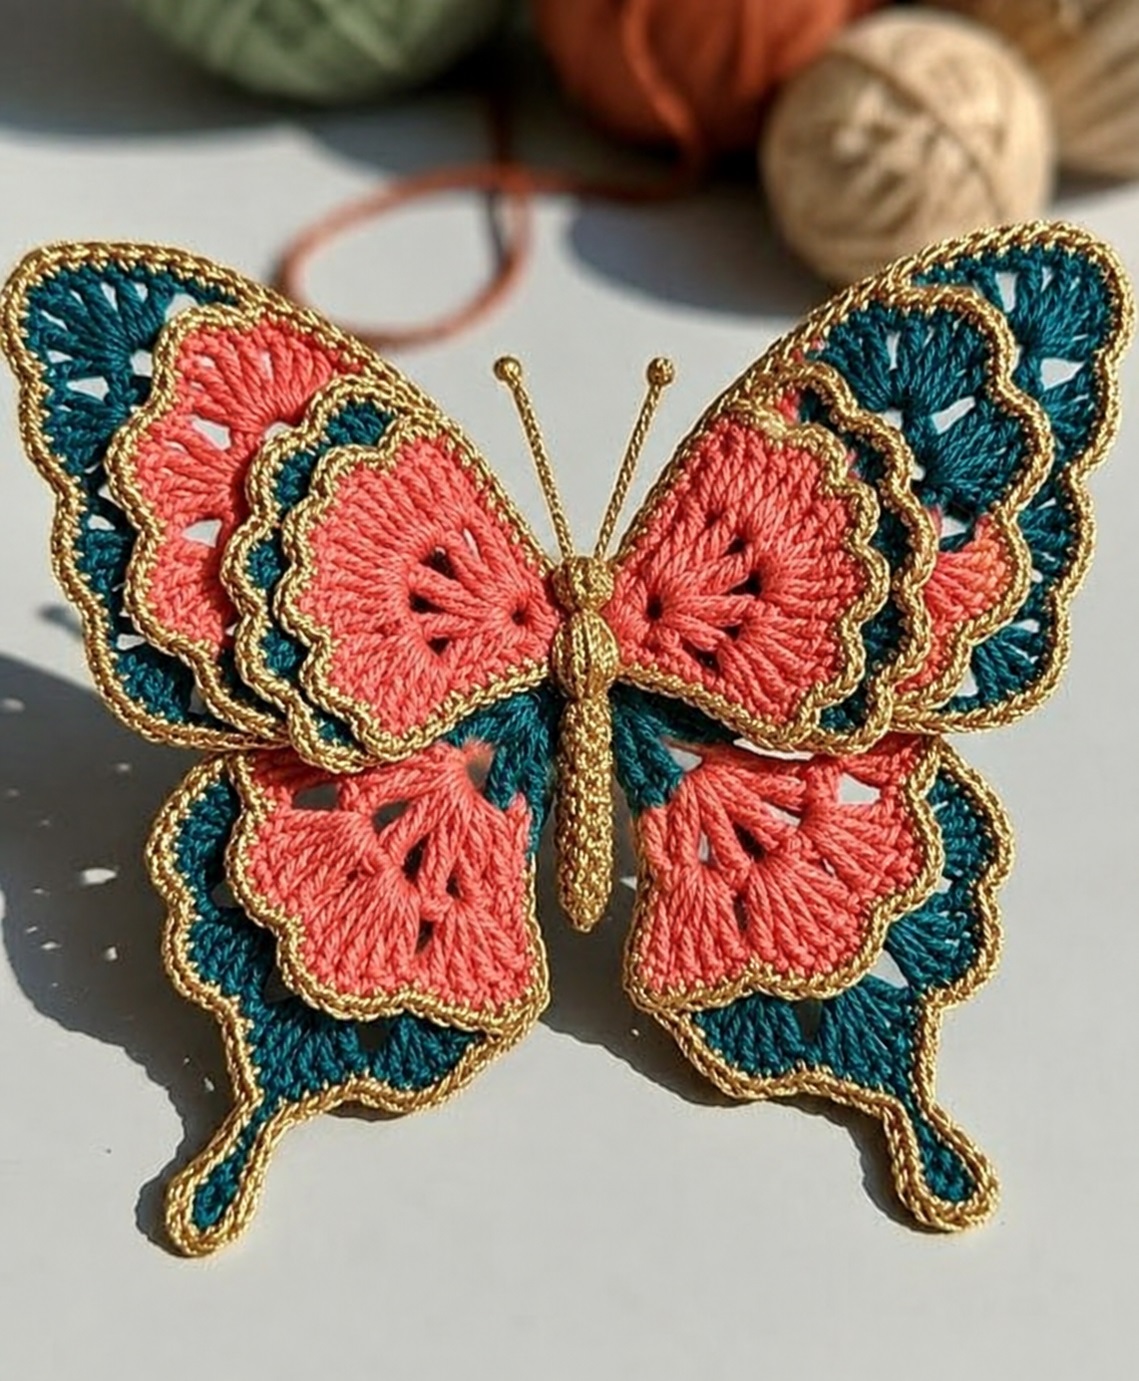
Three layered wings, a gold-edged finish, and a dimensional effect that makes people look twice — all worked with a 2mm hook and a little patience.
The Appliqué That Stopped Me Mid-Scroll
I have pinned a lot of crochet butterflies over the years. Most of them are pretty in a simple, flat kind of way — two symmetrical wings, a chain body, done. Perfectly lovely. But the moment I saw a three-layered version with that gold thread edging catching the light along every scalloped edge, I put down whatever I was working on and started immediately.
The dimensional effect comes from stacking three separate sets of wings on each side — large at the back, medium in the middle, small at the front — so the butterfly has genuine depth and a sculptural quality that flat appliqués simply cannot replicate. The gold thread edging around each individual wing layer is what gives it that finished, almost jewel-like appearance. And the whole thing is small enough to attach to almost anything: a hat, a bag, a cushion, a cardigan pocket, a baby blanket corner.
This is one of those projects where the finished result looks wildly disproportionate to the actual difficulty. The pattern is below, complete and written out in full.
Materials
Fine weight cotton yarn in your chosen main color — the original version uses royal purple, which photographs beautifully and gives the finished butterfly a rich, saturated look. Any fine weight yarn works well. Choose something with a smooth finish so the shell stitch scallops read clearly and the gold edging sits neatly against the edge.
Metallic gold embroidery thread or fine gold crochet thread for the body and edging. This is the detail that elevates the butterfly from pretty to genuinely stunning, and it is worth using real metallic thread rather than substituting a regular yarn in a gold shade. The sheen is the point.
You will need a 2.0 mm hook, a tapestry needle, and scissors. The small hook size gives the stitches a firm, structured quality that helps the wings hold their dimensional shape once assembled.
Abbreviations
ch — chain
sc — single crochet
dc — double crochet
sl st — slip stitch
sp — space
st(s) — stitch(es)
picot — chain 3, slip stitch into first chain
Understanding the Construction
Before you begin, it helps to understand what you are making and in what order. The butterfly is built in four separate stages: the body, the three sizes of wings (made in pairs — one set for each side), the gold edging applied to each individual wing, and finally the assembly where everything is stacked and joined.
You will make six wing pieces in total — two large, two medium, and two small. Each pair is a mirror image of the other. Once all six wings are edged in gold and the body is complete, the assembly takes only a few minutes and the butterfly comes together very quickly.
Part One — The Body
Work the body entirely in gold thread.
Chain 15. Single crochet back down the chain, working one sc into each chain — 14 sc total. This creates a slim, firm body with a slight natural curve that mimics the tapered shape of a real butterfly’s abdomen.
At the top of the body, work a small rounded head by crocheting a 3-dc cluster into the final stitch, or work a picot — chain 3, slip stitch into the first chain — for a smaller, neater head. Either approach works. The head simply needs to be slightly wider than the body so the antennae have somewhere to attach.
For the antennae, cut two short lengths of gold thread — approximately 3 to 4 inches each. Attach them to the top of the head with a firm knot, then tie a small knot at the end of each length to prevent fraying. The antennae do not need to be identical in length; a very slight variation looks more natural than two perfectly matching straight lines.
Set the body aside and begin the wings.
Part Two — The Wings
Each set of wings uses shell stitches to create the characteristic scalloped, rounded edges of a butterfly wing. You will make three sizes — large, medium, and small — with each new size simply reducing the stitch count to produce a proportionally smaller version of the same basic shape.
Make two of each size — one for each side of the butterfly.
Large Bottom Wing
Make a magic ring. Work a series of shell stitches into the ring — each shell is 5 to 7 double crochets worked into the same space. The number of shells you work determines the width of the wing. For the large wing, work 4 to 5 shells to create a wide, generously scalloped lower wing.
To add the characteristic pointed tail at the lower corner of the large wing, extend the final few stitches of the last shell into a slight point by working progressively taller stitches — ending with a treble crochet at the tip if desired. This tail gives the large wing the distinctive angular lower corner that makes it read as a butterfly wing rather than a generic scalloped shape.
Fasten off and leave a tail for assembly.
Medium Middle Wing
Repeat the large wing construction but reduce the number of rows or shells by two. The medium wing should be noticeably smaller than the large wing but follow the same scalloped structure. Skip the pointed tail on this layer — the medium wing has a rounder, softer lower edge that sits neatly inside the larger wing when stacked.
Fasten off and leave a tail for assembly.
Small Top Wing
Work the same shell stitch construction on a smaller scale again, this time focusing on just 2 to 3 scalloped sections. The small wing is the topmost layer and sits at the front of the finished butterfly, so it only needs to be wide enough to add depth and dimension — not wide enough to cover the layers beneath it.
Fasten off and leave a tail for assembly.
Part Three — The Gold Edging
This is the step that transforms a set of small purple crochet pieces into something that looks genuinely beautiful. Work the gold edging on every individual wing piece — all six of them — before assembly.
Join the gold thread to the outer edge of one wing with a slip stitch. Work one slip stitch into every stitch around the entire perimeter of the wing. At each scalloped peak — the highest point of each shell — work a decorative point: slip stitch, chain 1, slip stitch all into the same stitch. This creates a small sharp accent at every peak that catches the light and defines each scallop clearly.
Work the gold edging on every wing piece in the same way. The edging round takes only a few minutes per wing and the cumulative effect once all six are done is immediately striking — each wing suddenly looks finished and intentional in a way that the purple yarn alone does not quite achieve.
Fasten off and weave in the gold thread ends carefully on each wing. Gold metallic thread can be slippery, so weave each end in two directions and pull firmly before trimming.
Part Four — Assembly
Lay out all six edged wing pieces and the body in front of you before beginning assembly. Take a moment to check that the two large wings are roughly symmetrical, the two medium wings match each other, and the two small wings match each other. Small differences in tension between pieces can produce wings that look uneven when stacked, and it is much easier to identify and correct this now than after everything is sewn together.
Stacking each wing set: Take one large wing, one medium wing, and one small wing. Place the medium wing on top of the large wing so the inner straight edges align and the scalloped outer edges of the large wing are visible behind the medium. Place the small wing on top of the medium in the same way. You should now have three layers, each slightly smaller than the one beneath, with the scalloped edges of all three visible when viewed from the front.
Joining the layers: Using your tapestry needle and a length of purple yarn, sew the three layers together along the inner straight edge where all three pieces align. Work several secure stitches through all three layers. This join does not need to be decorative — it will be hidden against the body in the finished piece. What matters is that it is firm enough to hold the layers together through handling.
Repeat the stacking and joining for the second set of three wings.
Attaching the wings to the body: Place one completed wing set against each side of the gold body, with the inner joined edge running along the body and the scalloped layers fanning outward. Using the tapestry needle, sew each wing set securely to the body along the inner edge. The wings should sit at a slight upward angle — not completely horizontal and not completely vertical — so the butterfly has the natural resting posture of a real butterfly with open wings.
Attaching the Finished Butterfly
The completed butterfly can be attached to almost any surface with a few invisible stitches through the body and inner wing edges. For soft surfaces like fabric or knitwear, sew directly through with a tapestry needle and matching thread. For firmer surfaces like straw or woven bags, use a curved needle or attach a small pin backing to the body so the butterfly can be moved between items.
For a truly dimensional display effect, bend the wings very slightly at the body join so the outer edges lift fractionally away from the surface. This small adjustment is the detail that makes the butterfly look like it has just landed rather than been pressed flat.
Final Thoughts
This butterfly takes longer than a simple flat appliqué. There are more pieces, more ends to weave in, and a little more patience required at the assembly stage. But the finished result is in a completely different category from anything a flat version can produce.
It looks handmade in the best possible sense — the kind of thing someone picks up, turns over, and says: you made this?
Yes. You did.