A raised, cable-like texture built from just two repeating rows — this stitch looks like it belongs on an advanced pattern but works up with techniques most crocheters already know.
What This Stitch Actually Is
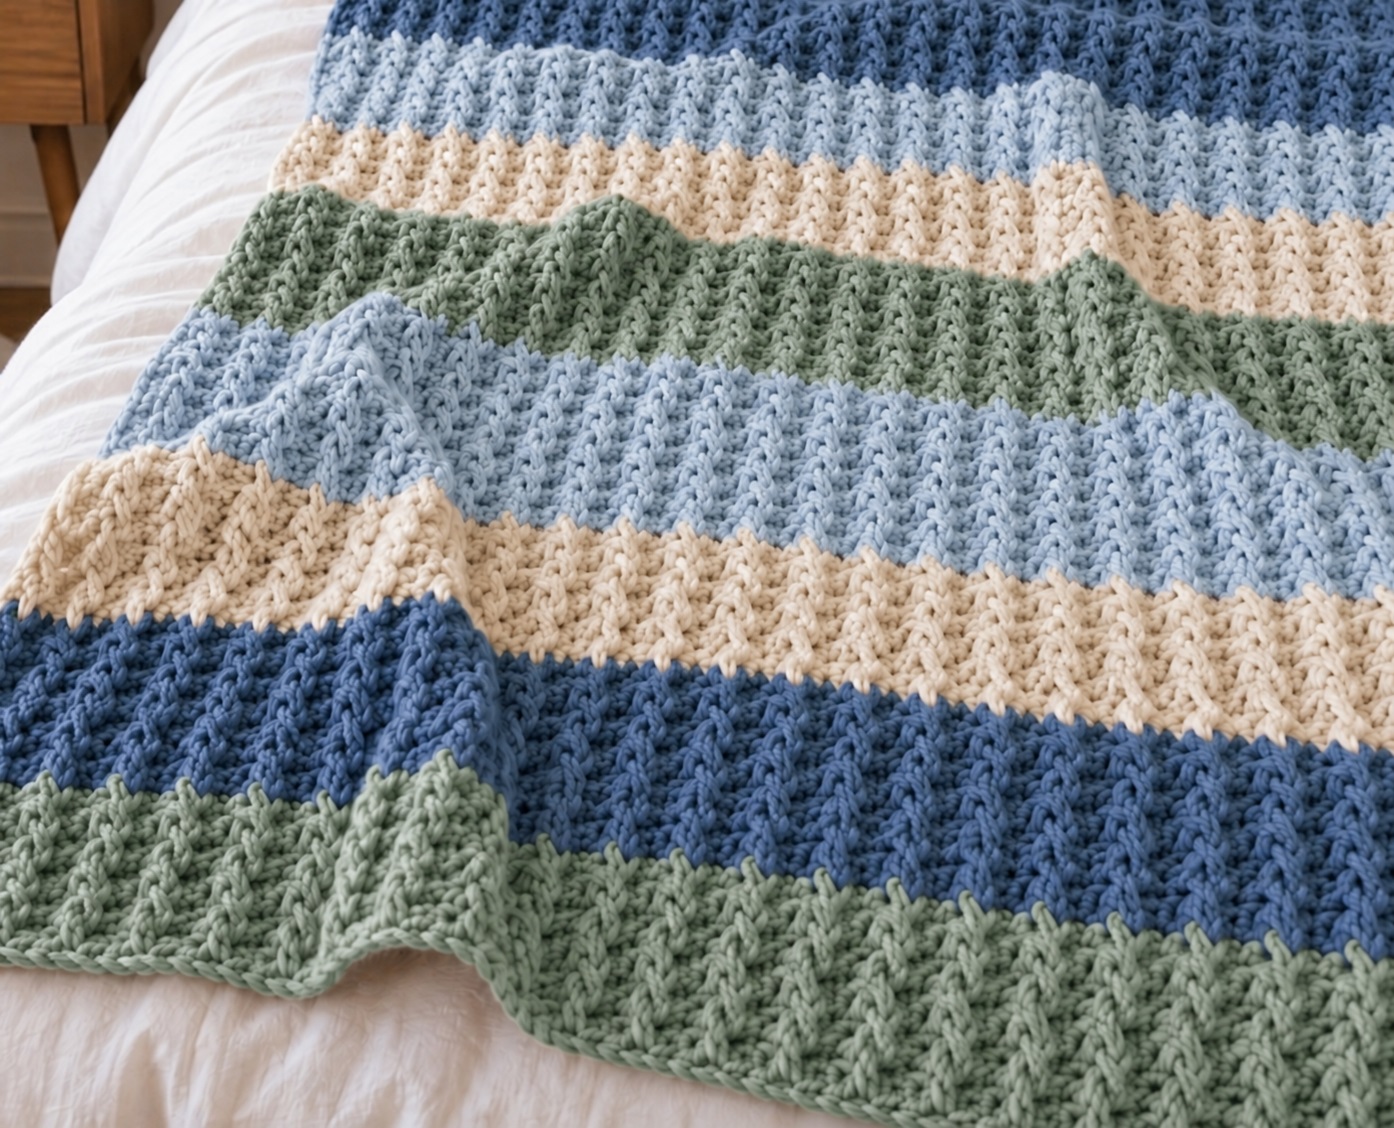
The Twist Crochet Stitch creates vertical cable-like columns across the fabric surface using a simple two-row repeat. One row is a plain slip stitch row. The other is a textured row that combines regular double crochet and front post double crochet stitches worked in a specific crossing sequence.
That crossing sequence — skip a stitch, reach down two rows to work a front post stitch, then come back and fill the skipped stitch — is what produces the twist. The front post stitch travels forward from the row below while the regular double crochet crosses beside it, and together they create the raised diagonal that runs across the fabric.
It looks like cabling. It is not cabling. It is two rows, repeated.
Skill Level
Easy to intermediate. You need to be comfortable with chains, double crochet, and slip stitch. The front post double crochet is the only technique that might be new, and it is explained in full before the pattern begins. If you have been wanting to practice front post stitches without jumping straight into a complicated cable pattern, this is an ideal starting point.
Materials
Worsted or medium weight yarn. A smooth, light-colored yarn is the best choice for learning this stitch — it makes the vertical posts from previous rows easy to identify, which matters a great deal in a stitch that requires you to reach down two rows to find the correct post. Once the stitch is familiar, any smooth yarn in any color works well.
A 5.0 mm (H/8) crochet hook, or the size appropriate for your chosen yarn. Scissors, a yarn needle, and optional stitch markers for tracking your edges.
Abbreviations
ch — chain
dc — double crochet
fpdc — front post double crochet
sl st — slip stitch
st/sts — stitch/stitches
sk — skip
rep — repeat
FO — fasten off
Stitch Multiple
Begin with any even number of chains. For a practice swatch, chain 24. This produces 22 working stitches after the first row. For larger projects, simply begin with a longer even-numbered foundation chain.
Special Stitch — Front Post Double Crochet
The fpdc is worked around the vertical post of a stitch rather than into the top loops.
Yarn over. Insert your hook from front to back and then back to front around the post of the indicated stitch — the vertical column of yarn, not the top loops. The post should now be sitting in front of your hook. Yarn over and pull up a loop — 3 loops on hook. Yarn over and pull through 2 loops. Yarn over and pull through the remaining 2 loops. One fpdc complete.
In this pattern the fpdc is always worked around a double crochet located two rows below the current row — deliberately reaching past the slip stitch row between them. That extra reach is what creates the raised cable effect.
The Pattern
Row 1 — Double Crochet Foundation
Chain 24. Work 1 dc in the 4th chain from the hook — the 3 skipped chains count as the first dc. Work 1 dc in every remaining chain across. You should have 22 stitches. Chain 1 and turn.
Row 2 — Slip Stitch Row
Work 1 sl st in every stitch across — 22 sl sts. Chain 3 and turn. The ch-3 counts as the first dc of the following row.
Keep these slip stitches relaxed. If they are too tight, inserting the hook on the following row becomes difficult and the fabric stiffens. A loose, comfortable tension through this row makes everything that follows easier.
Row 3 — First Twist Row
The ch-3 already counts as your first dc. Now work the twist repeat across the row.
Skip the next stitch from the slip stitch row — do not forget it, you will return to it in a moment. Look two rows below and find the next double crochet from Row 1. Work 1 fpdc around the post of that dc. Now go back to the slip stitch you skipped and work 1 regular dc into it. That is one complete twist.
Continue the same sequence across: skip 1 stitch, fpdc around the next dc two rows below, dc into the skipped stitch. Repeat until only the final edge stitch remains. Work 1 dc in the final stitch. Chain 1 and turn.
The repeat in short: skip 1 — fpdc two rows below — dc in skipped stitch.
After this row you should see small raised diagonal sections beginning to appear across the fabric. They will become more defined with each additional repeat.
Row 4 — Slip Stitch Row
Work 1 sl st in every stitch across. Keep stitches loose and even. Chain 3 and turn.
Row 5 — Twist Row
Repeat the same construction as Row 3. Skip 1, fpdc around the corresponding dc two rows below, dc in the skipped stitch. Continue across. Work 1 dc in the final stitch. Chain 1 and turn.
Pattern Repeat
Alternate the slip stitch row and the twist row for the full length of your project. That two-row sequence is the entire pattern from beginning to end.
The Most Important Thing to Understand
During every twist row, your hook goes to two different places for each pair of stitches.
For the fpdc — reach down two rows and wrap around the post of the dc below. For the regular dc — come back up and work into the slip stitch from the immediately previous row that you intentionally skipped.
Skip the top stitch. Reach down for the fpdc. Come back up to the skipped stitch. That movement is the whole stitch. Once it is in your hands it becomes automatic very quickly.
How to Find the Correct Post Two Rows Below
This is the part that causes the most confusion for beginners and it is worth spending a moment on before you begin.
Look directly below the slip stitch you are working near. Beneath the slip stitch row you will see the row of double crochets from the previous twist row. Each dc has a clear vertical post — a column of yarn running up through the center of the stitch. The fpdc wraps around that vertical column, not through the top loops.
After the first complete twist row, finding these posts becomes much easier because the raised texture in the fabric begins showing you exactly where each new stitch belongs. The stitch starts reading itself.
Troubleshooting
If your fabric is getting narrower: The most likely cause is forgetting to go back and work the regular dc into the skipped stitch after the fpdc. Skipping does not mean leaving a stitch unused — every skipped stitch gets its dc immediately after the fpdc. Also check that you are working the final dc at each edge.
If your fabric is getting wider: You may be working into an extra slip stitch or treating the beginning chain-3 as an additional stitch. The ch-3 at the start of every twist row already acts as the first dc — do not add a dc into its base.
If the slip stitches are difficult to work into: Your tension is too tight. Slip stitches naturally want to close up, especially when worked quickly. Hold the working yarn more loosely and allow each sl st to sit comfortably around the hook shaft before completing it. A slightly larger hook also helps if you naturally crochet tightly.
If the twists look flat: Check that your front post stitches are genuinely being worked around the post two rows below and not into the top loops of that stitch. Also check that you are not pulling the fpdc too tightly — it needs enough height to travel comfortably across the slip stitch row.
If the twists look uneven: Check that you are consistently skipping exactly one stitch each time, using the correct post below, returning to the skipped stitch, and keeping all fpdc stitches at approximately the same height. The fabric almost always becomes more uniform after three or four complete repeats.
Adjusting the Size
Because the foundation uses an even number of chains, resizing is straightforward. Chain 24 for a small swatch. Chain 40 for a wider sample. Chain 60 for a scarf-sized panel. Chain 100 or more for blanket-width projects. Always measure a swatch before calculating the foundation chain for a large project — yarn weight, hook size, and personal tension all affect the finished width significantly.
Color and Yarn
The twist texture reads most clearly in a solid color and a smooth yarn. Heavily variegated yarn tends to compete with the stitch pattern and reduce the visibility of the raised twists. If you want to add color interest without losing stitch definition, changing colors every two rows aligns the color shift with each complete pattern repeat and gives the finished piece a clean, structured stripe effect.
To change color cleanly, complete the final stitch of a twist row with the new color. Work the following slip stitch row entirely in the new shade, then continue normally.
Project Ideas
The raised texture of this stitch sits primarily on the front surface, which makes it particularly well suited to projects where one side is meant to be displayed. Blankets and throws show the twist pattern at its most dramatic. Scarves and cowls benefit from the structured surface and the warmth that the post stitches add. Cushion covers, headbands, sweater panels, table runners, and decorative home accessories are all excellent applications for a stitch that brings this much texture with this little complexity.
Adding a Border
For blankets and cushion panels, a simple single crochet border works best. The main fabric already carries significant visual weight and a more elaborate border would compete with the twist texture rather than frame it. Work one round of sc evenly around the finished piece, placing additional stitches at the corners as needed to keep them lying flat. Along the sides, space the stitches evenly rather than trying to force a specific number into each row end.
Finishing
After the final row, fasten off and cut the yarn leaving a comfortable tail. Use a yarn needle to weave all ends securely through the back of the fabric in two directions before trimming. Shape the piece gently with your hands. Light blocking can help straighten the edges and settle the raised twists into a more defined, even position — particularly useful for scarves and larger flat pieces where edge straightness matters.
Final Thoughts
The Twist Crochet Stitch delivers a result that looks significantly more complex than the two-row repeat behind it. The slip stitch rows are fast. The twist rows become rhythmic quickly. And the raised cable columns that build up across the surface give the finished fabric a quality that most people associate with advanced crochet techniques rather than a simple skip-reach-return sequence.
Work a swatch of ten rows. Watch the twists develop. Then decide what you are going to make with it.