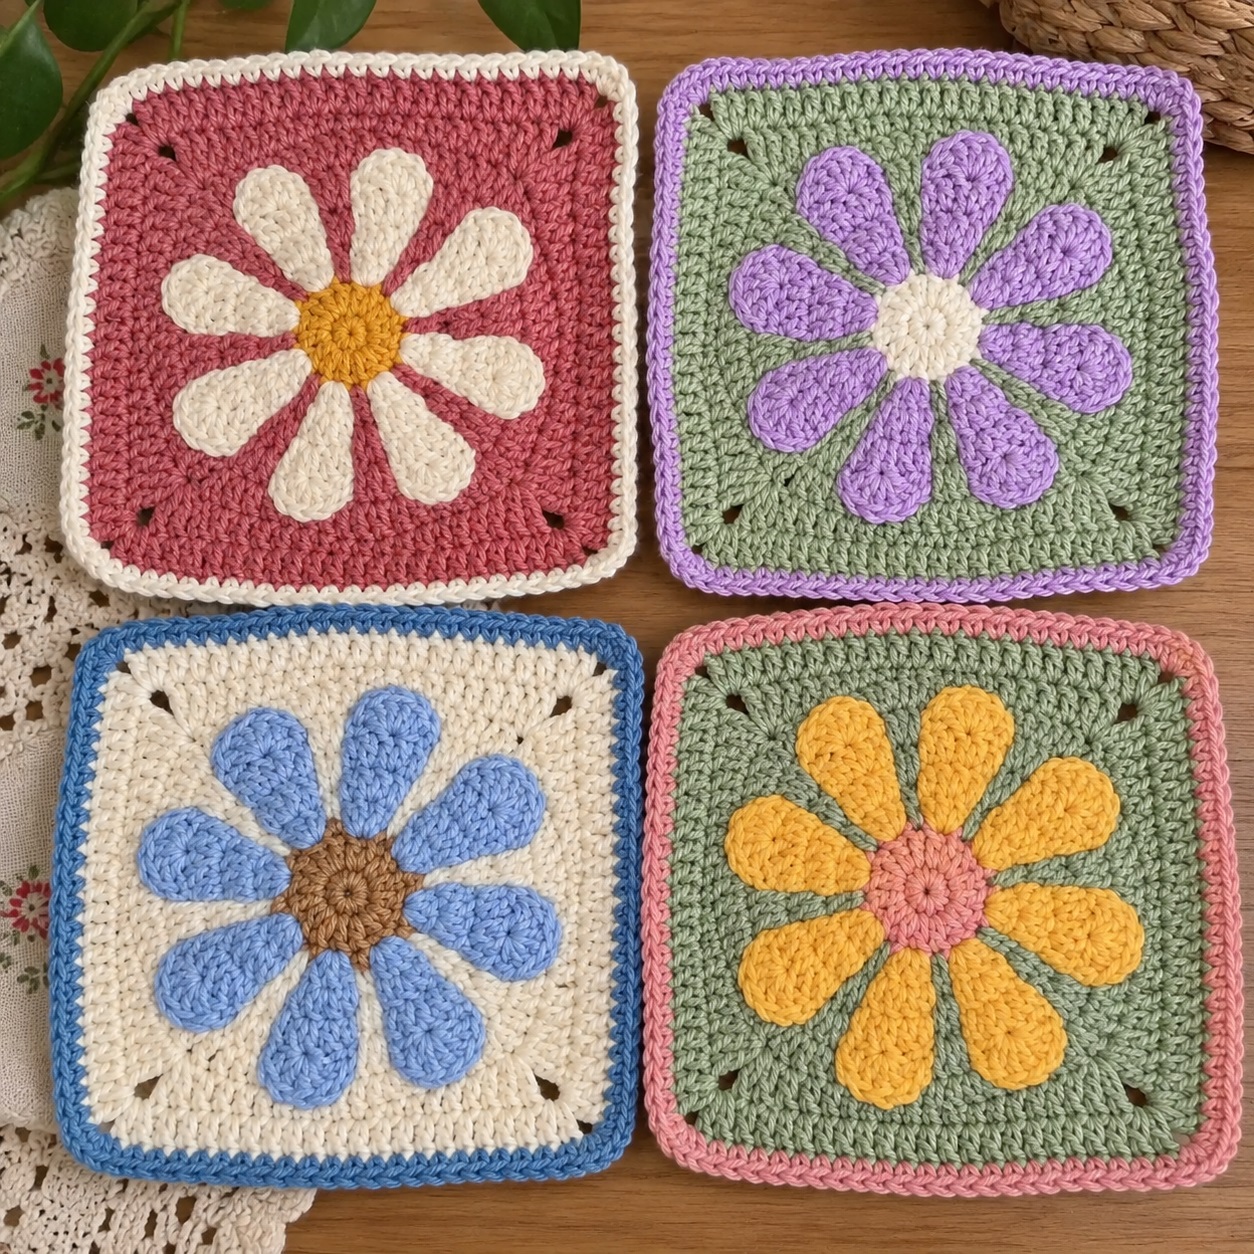
A chunky puff-stitch daisy centered inside a classic granny square — vintage charm, modern versatility, and endlessly satisfying to make.
The Square I Could Not Stop Making
Some crochet motifs are pretty. Some are satisfying to work. Every now and then you find one that is both, and those are the dangerous ones — the ones that end up taking over your entire project basket because you just need to make one more.
The Retro Daisy Granny Square is that motif for me.
There is something about the combination of a raised puff-stitch flower sitting inside a classic granny square frame that feels both nostalgic and fresh at the same time. It looks like something your grandmother might have made, but it also looks perfectly at home on a modern sofa. Make it in earthy terracotta and cream for something warm and vintage. Make it in bright jewel tones for something cheerful and bold. Make it in soft neutrals for something quiet and elegant. The same construction produces a completely different result depending on the colors you choose, which is part of why this motif is so addictive.
The complete pattern is below, worked in three clear stages: the center, the daisy petals, and the granny square frame.
Materials
DK or worsted weight yarn in three colors — one for the center, one for the petals, and one for the background square. This three-color combination is the classic approach and gives the daisy the most visual impact. You can also work the center and petals in the same color for a two-tone look, or use a different background color for every square if you want a scrappy, patchwork effect.
Use a 4.0 to 5.0 mm hook depending on your yarn weight and personal tension. If your motif feels stiff or the puff stitches are difficult to close, move up half a hook size. You will also need scissors and a yarn needle for weaving ends.
Abbreviations
ch — chain
dc — double crochet
sc — single crochet
sl st — slip stitch
sp — space
st — stitch
puff st — puff stitch (instructions below)
Special Stitch — Puff Stitch
The puff stitch is what gives the daisy petals their raised, chunky character. To work a puff stitch: yarn over, insert hook into the indicated stitch or space, pull up a loop — three times into the same stitch, so you have seven loops on your hook. Yarn over and pull through all seven loops to close the puff. Chain 1 immediately to lock it in place.
For fuller, more rounded petals, work the pull-up step four times instead of three before closing. Keep the height of your pulled loops consistent across every petal — if some loops are taller than others, the petals will look uneven and the daisy will sit off-center in the finished square.
Stage One — The Center
With your center color, make a magic ring. Chain 3 — this counts as your first double crochet throughout. Work 11 more double crochets into the ring so you have 12 double crochets total. Pull the magic ring closed tightly so no hole remains at the center. Join with a slip stitch to the top of the beginning chain-3. Fasten off the center color and weave in the end before moving on.
If you prefer not to use a magic ring, chain 4 and join with a slip stitch to form a ring, then work the 12 double crochets into that ring instead. The magic ring gives a neater, tighter center, but both methods produce the same finished result.
Stage Two — The Daisy Petals
Attach the petal color with a slip stitch into any stitch from the center round. Chain 2 — this does not count as a stitch. Work one puff stitch into that same stitch, then chain 1 to lock it. Move to the next stitch and repeat: one puff stitch, chain 1. Continue all the way around the center, working one puff stitch into each of the 12 double crochets. You will end with 12 petals evenly spaced around the center.
When you reach the last puff, join with a slip stitch into the top of the very first puff stitch. Fasten off the petal color.
Take a moment here to look at the flower before moving on. All 12 petals should sit at roughly the same height and the daisy should look balanced and centered. If one or two petals look noticeably flatter or taller than the others, it is worth adjusting your tension on the next square rather than trying to correct individual petals at this stage.
Stage Three — The Granny Square Frame
This is the stage where a circular daisy becomes a square motif, and it happens through one clever trick: placing corner sequences at four evenly spaced points around the flower.
Attach the background color with a slip stitch into any chain-1 space between two puff stitches. Chain 3 — this counts as your first double crochet. Work 2 more double crochets into that same chain space to complete the first cluster. Work 3 double crochets into each of the next two chain spaces. Into the fourth chain space, work the first corner: 3 double crochets, chain 2, 3 double crochets — all into that same space. That chain-2 space is your corner.
Continue around the flower, working 3 double crochets into each chain space and repeating the corner sequence — 3 dc, ch 2, 3 dc — at every fourth chain space. You will make four corners total, evenly spaced around the daisy. When you reach the end of the round, join with a slip stitch to the top of the beginning chain-3.
The daisy will now be framed inside a square. The petals should still be clearly visible, sitting on top of the background color rather than being buried by it. If the background stitches are covering the petals, check that you are working into the chain-1 spaces between puffs rather than into the puffs themselves.
Making the Square Larger
One round of background color around the daisy produces a small motif. For a larger square — suitable for a blanket or throw where you want fewer motifs to join — continue adding granny rounds in the same background color or alternate colors for a more decorative effect.
To work each additional round, attach yarn in any corner chain-2 space. Chain 3. Work 2 double crochets into that same corner space. Along each side, work 3 double crochets into every space between clusters. At each corner, work the full corner sequence: 3 dc, ch 2, 3 dc into the corner chain-2 space. Join each round with a slip stitch to the top of the beginning chain-3.
Each new round adds one additional cluster to every side and keeps the corners sharp and clean. Add as many rounds as you need to reach your desired finished size. Two additional rounds around the daisy is a good size for a blanket motif in worsted weight yarn.
Finishing the Square
Once the square has reached the size you want, work one final round of single crochet evenly around the entire perimeter, placing 3 single crochets into each corner chain-2 space. This final round gives the square a clean, structured edge that makes joining much easier and gives the finished blanket a more polished appearance.
Fasten off and weave in all ends securely, running each tail through several stitches in two different directions before trimming.
Block each finished square lightly — a quick steam or a mist of water and a gentle pat into shape is enough. Blocking sharpens the corners, settles the granny clusters into even rows, and helps the daisy sit centered and flat inside the frame. The difference between a blocked and unblocked granny square is significant, and it takes less than a minute per motif.
Joining Squares Into a Blanket
Lay all your finished squares out before joining and check the color balance. Step back or take a photo — photographs show color clustering that is easy to miss when you are standing over the layout. Rearrange until you are happy, then join row by row so you do not lose the plan.
For joining, a whipstitch through the back loops of both squares gives a flat, nearly invisible seam. A slip stitch join worked through both edges on the right side creates a visible ridge between squares that adds a decorative grid effect to the finished blanket. Both methods work well — choose based on the look you want and use the same method consistently throughout.
Final Thoughts
The Retro Daisy Granny Square is one of those motifs that gets better the more you make. The first one takes a little time to understand. By the fifth you are working the three stages almost without thinking. By the twentieth the daisy is sitting perfectly centered every time and the corners are lying completely flat.
And then you lay them all out on the floor, step back, and realize you have made something that looks like a garden.
That is the moment every puff stitch was working toward.