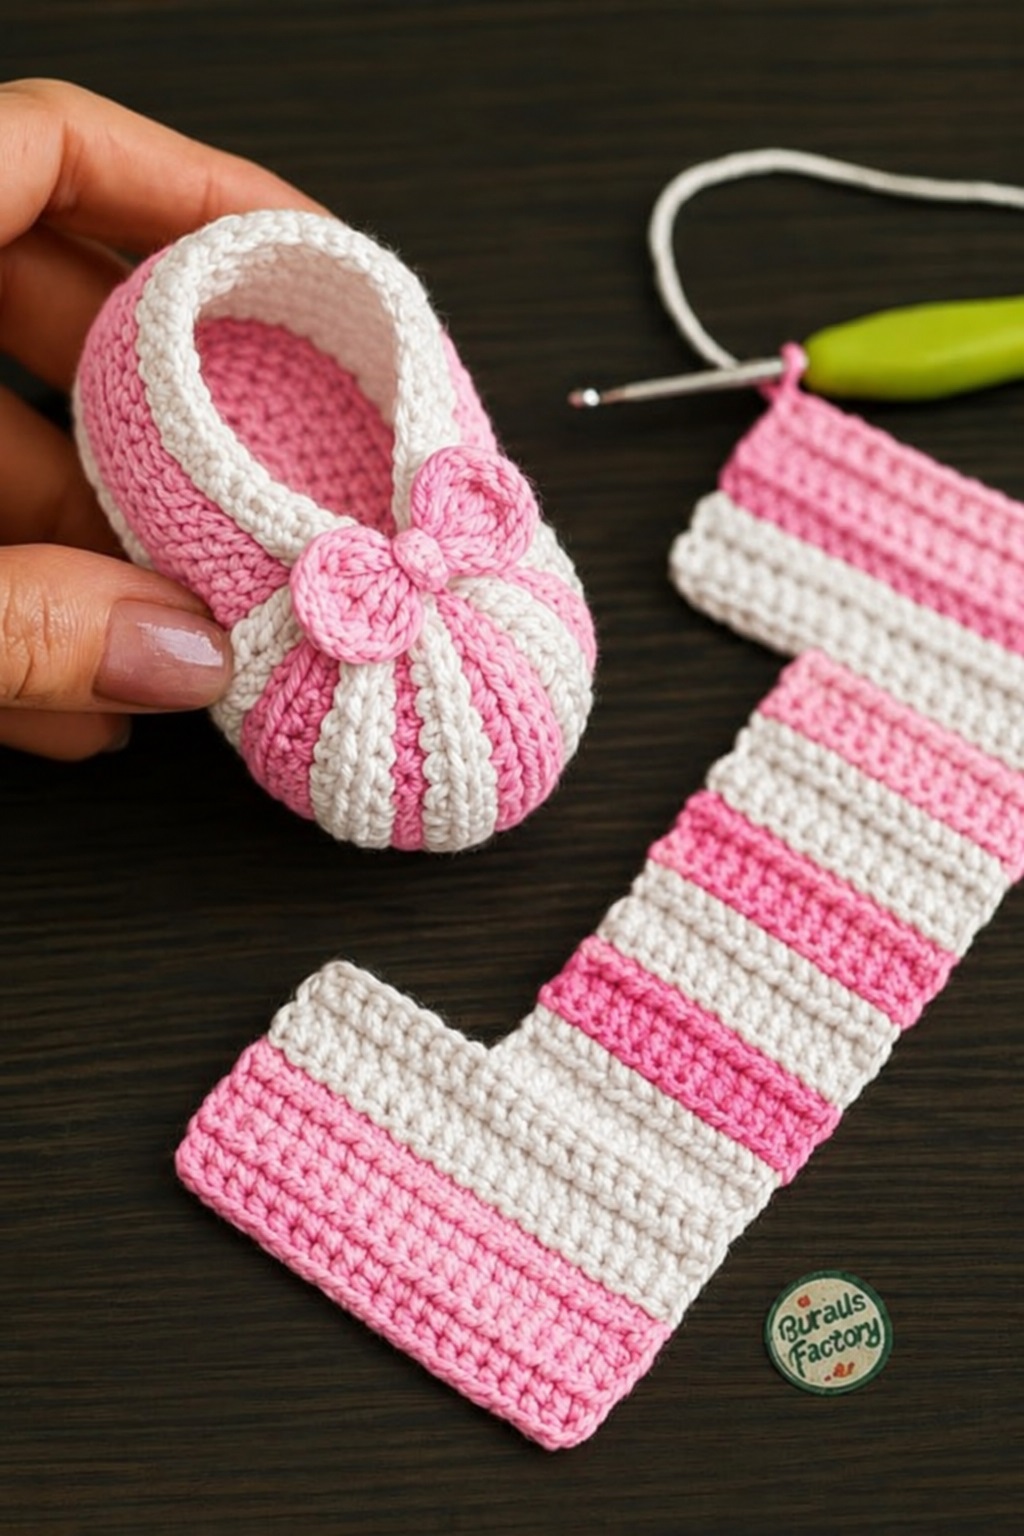
Worked from the sole up with a simple stripe sequence and a tiny crocheted bow — small enough to finish in one evening, sweet enough to give at any baby shower.
The Project That Fits in Your Pocket and Steals Every Heart in the Room
There is something about a handmade baby bootie that gets people every time. You can bring the most elaborate crocheted blanket to a baby shower and receive polite, genuine appreciation. You bring a pair of tiny striped booties with a little bow on the front and the room loses its mind.
I think it is the scale. Something so small and so carefully made feels like an act of love in a way that larger projects sometimes do not, even though they took ten times longer. These two-color striped booties are worked from the sole upward in simple rounds, use only single crochet and half double crochet throughout, and finish with a tiny crocheted bow that takes about four minutes to make and causes approximately forty minutes of cooing from everyone who sees them.
The pattern uses US crochet terminology and is suitable for anyone comfortable with basic stitches and working in rounds. The complete pattern is below.
Materials
DK or worsted weight yarn in two colors. The original version uses green and yellow — Color A and Color B alternating every round through the body of the bootie — but any two colors that complement each other will work beautifully. Soft neutrals, classic pink and white, pale blue and cream, or bright contrasting colors all produce a completely different character from the same construction.
Use a 3.5 mm hook for DK weight yarn or a 4.0 mm hook for worsted. If your sole is coming out stiff or the stitches are difficult to work into, move up half a hook size. You will also need scissors, a yarn needle for weaving ends, and one stitch marker to track the beginning of each round.
Abbreviations
ch — chain
sc — single crochet
hdc — half double crochet
sc2tog — single crochet decrease
sl st — slip stitch
BLO — back loop only
st(s) — stitch(es)
rnd — round
Part One — The Sole
The sole is worked in oval rounds that build a flat, shaped base for the bootie. Work this section entirely in Color A.
Foundation Chain: Chain 10.
Round 1: Work 1 hdc in the 3rd chain from the hook. Hdc in each of the next 6 chains. Work 5 hdc into the final chain to turn the corner at the toe. Continue working hdc back along the other side of the foundation chain — 7 hdc across. Work 4 hdc into the last stitch to turn the heel corner. Join with a slip stitch to the first hdc. You should have 24 stitches total.
Round 2: Chain 2 — this counts as your first hdc. Work 1 hdc into the same stitch. Hdc in each of the next 7 stitches. Work 2 hdc into each of the next 5 stitches across the toe — these are your toe increases. Hdc in each of the next 7 stitches. Work 2 hdc into each of the last 4 stitches at the heel. Join with a slip stitch. You should have 34 stitches total.
Round 3: Chain 1. Working in the back loop only, work 1 sc into every stitch around. Join with a slip stitch.
This back-loop-only round is the detail that makes the bootie look professionally finished. It creates a subtle horizontal ridge around the base of the bootie that defines where the sole ends and the sides begin, and it encourages the fabric to turn upward naturally into the body of the shoe.
Part Two — The Striped Body
From this point forward the bootie grows vertically upward, and the two-color stripe sequence begins. The color changes happen every round, which produces clean, even horizontal stripes with almost no effort.
Round 4: Attach Color B. Chain 1. Work 1 sc in every stitch around, working through both loops now. Join with a slip stitch.
Round 5: Attach Color A. Chain 1. Work 1 sc in every stitch around. Join with a slip stitch.
Rounds 6, 7, and 8: Continue alternating Color B and Color A every round. The sides of the bootie should be growing straight upward with clean color stripes running horizontally around the body.
A note on carrying yarn: rather than fastening off each color after every round, you can carry the unused color up the inside of the bootie, picking it up again when needed. This reduces the number of ends to weave in significantly and keeps the inside of the bootie tidy.
Part Three — Shaping the Toe
The toe shaping is what transforms a straight tube into the shaped front of a bootie, creating the gentle arch that follows the curve of a baby’s foot.
Round 9 (Color A): Work sc across the back and both sides of the bootie. When you reach the center front — the toe section — work 4 sc2tog decreases evenly across the center 8 stitches. Continue sc to the end of the round. Join with a slip stitch.
Round 10 (Color B): Work sc all the way around. Work 3 to 4 sc2tog decreases evenly across the center toe section again. Join with a slip stitch. The front of the bootie should now have a noticeably narrower, more shaped appearance.
Round 11 — The Cuff: Work one final round of single crochet or slip stitch around the entire top opening to finish the edge cleanly. Fasten off and weave in all yarn ends.
Part Four — The Bow
The bow is optional, but I will say this: it takes four minutes and it is the detail that makes everyone in the room gasp a little. Do not skip it.
Chain 5. Single crochet in the 2nd chain from the hook and in each chain across — 4 sc. Chain 1 and turn. Work 3 to 5 rows of single crochet to create a small flat rectangle.
Fasten off and leave a long tail. Take a separate short piece of contrasting yarn and tie it tightly around the center of the rectangle, pulling it firmly so the fabric gathers in the middle and the two ends puff outward into a bow shape. Knot the contrasting piece at the back to secure it.
Using your yarn needle and the long tail, sew the finished bow securely onto the center front of the bootie, positioning it just above the sole ridge so it sits at the natural high point of the toe.
Make a second bootie — and a second bow — following the same steps.
A Few Tips Before You Begin
Work the sole rounds at a firm tension. A floppy sole will produce a bootie that loses its shape quickly once it is worn or washed. If your foundation oval is coming out looser than you would like, try the next hook size down for the sole rounds only and switch back up for the body.
Count your stitches at the end of every sole round. The increases in Rounds 1 and 2 are the foundation for everything that follows, and catching a miscounted increase at Round 2 is much easier than discovering a misshapen sole at Round 9.
Make both booties at the same time if possible — working a few rounds on one, then switching to the other — so the tension stays consistent between the pair. Two booties made days apart sometimes come out slightly different sizes even with the same hook and yarn, simply because your tension shifts between sessions.
Final Thoughts
These booties are small enough to finish in a single evening and meaningful enough to keep for years. I have seen pairs like these tucked into memory boxes, photographed for birth announcements, and worn in hospital pictures. They are the kind of handmade gift that feels like something special rather than something practical — even though they are both.
Make a pair in the baby’s nursery colors. Make a pair in every neutral you own as gifts to keep on hand. Make a pair just because you have an hour and some leftover DK yarn and you want to make something that will make someone smile.
They always do.