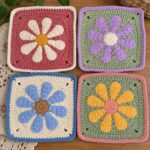
A meadow of raised, cushiony blooms joined into one gorgeous throw — more achievable than it looks and more satisfying than almost anything else you will make this year.
The Blanket That Looks Like a Garden
The first time I saw a puff flower blanket in person I did what I suspect most crocheters do — I picked it up, turned it over, held it close to my face, and tried to figure out how on earth someone made it.
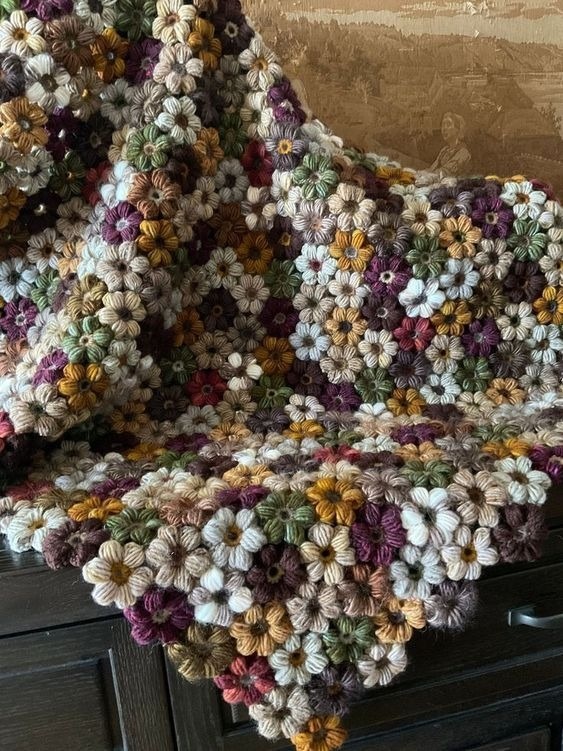
Those raised, rounded petals sitting on top of each motif like real flowers. The way the whole blanket drapes softly because of the thickness of the individual blooms. The scattered, garden-patch color placement that looks effortless but is clearly very deliberate. It is one of those projects that looks significantly more complicated than it actually is, and once you understand the basic structure of a single motif, the whole thing clicks into place.
This guide walks you through everything — making the motif, joining the flowers, building the blanket, and finishing with a border that frames the whole thing without competing with the flowers themselves.
Materials
Any soft worsted or aran weight yarn works beautifully for this project and gives the petals the plump, cushiony appearance that makes puff flower blankets so distinctive. DK weight produces a lighter, more delicate result. Chunky yarn makes a bold, heavy throw with oversized blooms. Whatever weight you choose, pick a yarn with good stitch definition — the puff technique depends on the loops holding their shape, and a fuzzy or halo yarn will obscure the texture you worked hard to create.
You will need at least two colors — one for the center and one for the petals — but most puff flower blankets use many colors for a scattered meadow effect. Choose a hook that matches your yarn label and consider going up 0.5 mm if your motifs feel tight or the petals are difficult to close. You will also need scissors, a yarn needle, and stitch markers to track corners and row positions during assembly.
Understanding the Structure
Every puff flower motif is built in three stages. First, a small center ring. Second, an anchor round that creates evenly spaced loops around the center — one loop per petal. Third, the petal round, where each loop is filled with a raised puff stitch that gives the flower its three-dimensional character.
After the flower is complete, it can be joined as a circle or squared up with corner stitches for a cleaner, more structured blanket. Both approaches work. The choice depends on whether you want a soft, organic, almost wavy blanket or a more even, quilt-like layout.
Making the Motif
Step 1 — The Center Ring
Start with a slip knot and chain 4. Join with a slip stitch to form a ring, or use a magic ring for a tighter center with no visible hole. Chain 1. Work 8 single crochets into the ring — this is a reliable base for a medium-sized puff flower. Join with a slip stitch to the first single crochet. Fasten off here if you want a different color for the next round, or continue if the center and anchor round will be the same color.
Step 2 — The Petal Anchor Round
Attach your next color with a slip stitch into any stitch of the center. This round creates the evenly spaced loops that each petal will grow from. Chain 3, then slip stitch into the next center stitch. Repeat all the way around — one chain loop per center stitch — so you have 8 loops total. You can also use single crochet anchors instead of slip stitches if you prefer a firmer connection. What matters is consistency: the same number of loops as petals, worked at the same tension throughout. Join to the first loop.
Step 3 — The Puff Petals
This is the step that makes the whole blanket. Work into the first chain loop. Yarn over, insert hook, pull up a long loop to approximately the height of a double crochet. Repeat that same motion — yarn over, insert, pull up a long loop — into the same loop four to six times, so you have multiple loops sitting on your hook. Yarn over and pull through all loops to close the puff. Chain 1 immediately to lock it in place. That locking chain is essential — without it the puff will gradually loosen and flatten over time.
After locking, slip stitch or single crochet into the next anchor point between loops, then move to the next loop and repeat. Work one puff petal into every loop around. Keep the height of your pulled loops consistent — if one petal is taller than the rest the flower will look uneven. If your petals are too flat, pull the loops up slightly higher. If they are too bulky to close comfortably, reduce the number of pull-ups by one.
Step 4 — Squaring Up (Optional)
A circular flower can be joined as is, but squaring up the motif creates a cleaner blanket with more even joins. To square a puff flower, work a round of single crochets around the outside of the flower and place a (sc, ch 2, sc) corner at four evenly spaced points between petals. Use slightly fewer stitches along the sides to keep the square lying flat without ruffling. If you prefer the soft, organic, slightly wavy look with petals visible at the edges, skip squaring entirely and join the flowers directly between petals.
Planning Your Blanket Size
Before you commit to making a hundred flowers, crochet five to ten motifs first and measure the average width. A typical puff flower in worsted yarn measures around 8 to 10 cm across depending on hook size and puff height. From there, the calculation is simple: divide your desired blanket width by the motif width to get the number of flowers per row, and divide the desired blanket height by the motif height to get the number of rows.
For a baby blanket, you will need roughly 40 to 60 motifs. For a throw, expect 120 to 180. For a full bed-size blanket, plan for 250 or more. The border can compensate for small sizing discrepancies, so your calculations do not need to be exact.
Joining the Flowers
Join-as-you-go is the neatest method if you want to avoid sewing at the end. During the final round of each new motif, replace certain stitches with slip stitches or single crochets that connect directly to the neighboring motif. It requires planning your layout as you work, but produces a clean, strong join with almost no finishing.
Whipstitch or mattress stitch with a yarn needle is the most controlled option if you have already completed a pile of flowers. You can align petals carefully before committing to the seam and the result is neat and sturdy.
A crocheted join worked through both motif edges with slip stitches or single crochets creates a visible ridge between flowers that adds structure and a decorative element to the blanket surface.
Whichever method you choose, use it consistently across the entire blanket. Mixed joining methods create uneven tension that shows in the finished piece.
Before joining, lay all your motifs out on a bed or the floor and step back to check the color balance. The most beautiful puff flower blankets have a scattered, garden look — no color clustered too heavily in one area. Take a photo of your layout before you start joining. A photograph reveals color clumps that your eyes miss in person.
The Border
A border serves two purposes in a puff flower blanket. It makes the finished piece look intentional and professional, and it corrects any waviness or unevenness at the edges created by the thickness of the motifs.
Begin with a foundation round of single crochet around the entire blanket, placing (sc, ch 2, sc) in each corner. If the edge ruffles outward, you are adding too many stitches — skip one occasionally to flatten it. If the edge pulls inward, add a few extra stitches along the tight sections. After the foundation round, work two or three rounds of half double crochet for a clean, simple frame, or finish with a scalloped edge for something more decorative. Keep the border calm — the flowers are the feature and the border should frame them rather than compete.
Finishing
Weave in ends as you go rather than saving them all for the end. Puff flowers generate a significant number of yarn tails if you are working in multiple colors, and doing them all at the finish line is genuinely demoralizing. Use a yarn needle and weave each tail through several stitches in two different directions to lock it securely.
To block, steam lightly or mist with water and pat into shape. Do not crush the puffs — shape them gently with your fingers so they stay dimensional and raised. The joins and border benefit the most from blocking and will settle into a much flatter, more even result after drying.
Final Thoughts
A puff flower blanket is one of those projects that rewards patience with something genuinely beautiful. The first motif takes a little time to understand. The second one is faster. By the tenth you are making them almost without looking. And then one day you lay them all out on the floor and suddenly you have a garden.
That is the moment that makes every puff worth it.