Crochet Hexagon Cardigan — Free Pattern
A granny-style cardigan built from just two hexagons — clever construction, flexible fit, and endlessly customizable from the first round to the final button.
The Cardigan That Starts as a Hexagon
If you have ever looked at a crochet cardigan and quietly decided it was probably too complicated to attempt, this pattern is about to change your mind.
The Crochet Hexagon Cardigan is one of those designs that works through a genuinely clever construction — the kind that feels almost like a puzzle until the moment it clicks, and then you cannot stop thinking about how elegant the solution is. You begin with two large granny-style hexagons. Not two fronts, two backs, and two sleeves. Just two hexagons. And somehow, through folding, extending, and joining, those two pieces become a cardigan with sleeves, a neckline, a fitted body, and as much or as little length as you want.
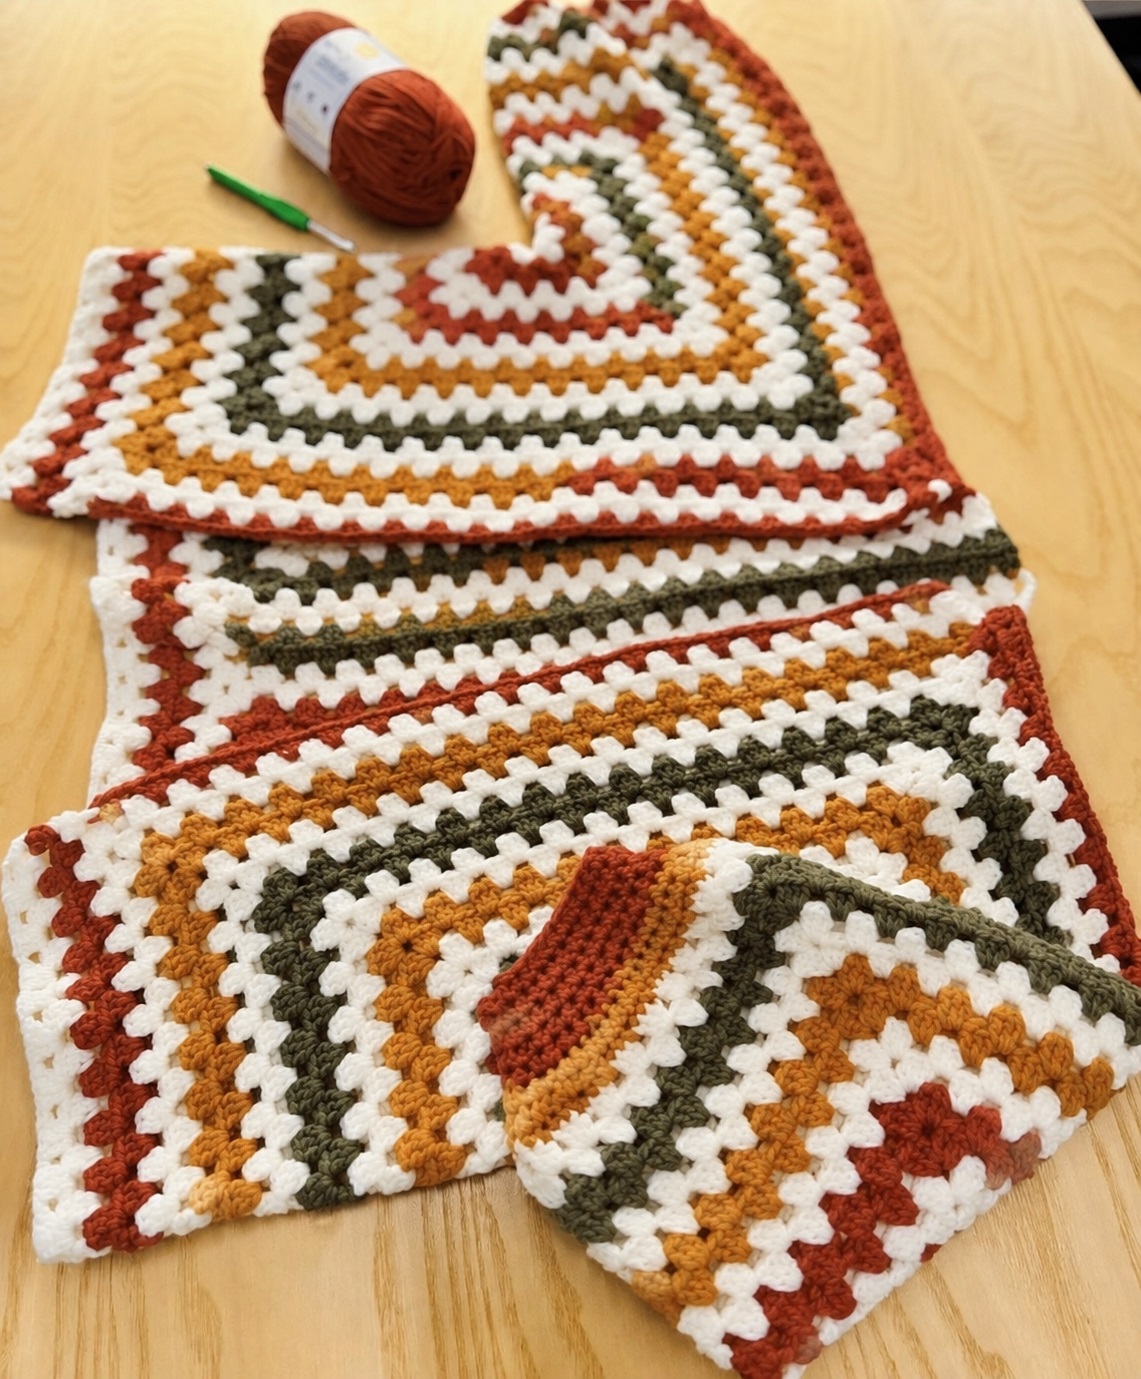
The construction gives you real control over the fit at every stage. You can make the sleeves longer. You can add more body length. You can leave the front open or add a button band. You can work the whole thing in one color for a classic, understated look, or use scraps and alternating shades for something more colorful and personal. The same basic structure produces endlessly different results depending on the choices you make along the way.
This article includes the complete pattern, written out in full, with detailed guidance on every stage of construction.
At a Glance
| Detail | Specification |
|---|---|
| Skill Level | Intermediate |
| Construction | Two granny hexagons, folded and joined |
| Sizing | Made to measure — adjustable at every stage |
| Hook Size | 5.0 mm, or size needed for fabric you like |
| Yarn Weight | Light weight or light worsted |
| Yarn Reference | Approximately 550 m per 200 g |
Materials
- Light weight or light worsted yarn in your chosen colors
- 5.0 mm crochet hook, or size needed to obtain a fabric you are happy with
- Stitch markers
- Yarn needle
- Scissors
- Measuring tape
- Buttons (optional)
This pattern works with almost any smooth yarn in the light to light worsted weight range. A yarn with good stitch definition will make the granny clusters read most clearly. If you are using a single color, choose something with enough body to hold the cluster shape. If you are working with multiple colors or scrap yarn, consistency in weight across colors matters more than brand.
Abbreviations
| Abbreviation | Meaning |
|---|---|
| ch | chain |
| dc | double crochet |
| sl st | slip stitch |
| sp | space |
| st(s) | stitch(es) |
| cl | cluster (3 dc in same space) |
| fpdc | front post double crochet |
| bpdc | back post double crochet |
| RS | right side |
| WS | wrong side |
Special Stitches
Cluster (cl): Work 3 double crochets into the same space.
Corner: Work (cl, ch 2, cl) into the indicated corner space.
Before You Begin — Taking Your Measurements
This cardigan is designed to be customized through measurements rather than a fixed round count. Before you begin, take the following measurements and write them down. You will refer to them throughout the pattern.
Arm Depth: Measure around the arm at the point where you want the sleeve to fit. This determines when to stop working all six sides of the hexagon.
Finished Chest: Measure around the bust or chest and add any positive ease you would like. A relaxed fit typically adds 5 to 10 cm of ease.
Quarter Chest: Divide your desired finished chest circumference by 4. This number tells you when the body extension is wide enough.
Finished Length: Measure from the shoulder to where you want the cardigan to end.
Center Back to Wrist: Measure from the center of the upper back, across the shoulder, and down to the wrist. This guides your sleeve length.
Having these five numbers written down before you cast on will make every sizing decision throughout the pattern straightforward and confident.
How the Construction Works
It helps to understand the overall structure before beginning, so that each stage makes sense as you work through it.
Stage 1 — Build the hexagon: Each hexagon is worked outward from a central magic ring in all six directions equally. This continues until one side of the hexagon reaches your Arm Depth measurement. The hexagon will likely become slightly wavy rather than lying flat — this is completely normal and intentional. That extra fabric is what allows it to fold and drape into the sleeve and body sections.
Stage 2 — Extend three sides: Once the sleeve depth is established, you stop working all the way around and instead extend only three consecutive sides of the hexagon. These three sides become the front, bottom, and back of the cardigan. The other three sides remain as they are and form the sleeve. This selective extension is what allows you to add chest and body width without making the sleeves any wider.
Stage 3 — Fold and join: Each finished hexagon is folded into an L shape. The two pieces are placed as mirror images of each other, joined at the center back and across the shoulders, and the sleeves are finished in the round.
Stage 4 — Finish: Sleeves are tapered and cuffed, body length is added if needed, and a simple front edging completes the cardigan.
The Pattern
Hexagon
Make 2 identical pieces. Turn your work after every round.
Round 1
Make a magic ring.
Chain 3. (The beginning ch-3 counts as the first dc throughout.)
Work 2 dc into the ring. Chain 2.
3 dc into the ring. Chain 2.
Repeat from * to * 5 more times.
Join with slip stitch to top of beginning ch-3. Turn.
— 6 clusters and 6 ch-2 corner spaces.
Round 2
Slip stitch into first ch-2 corner space.
Chain 3. Work 2 dc in same space. Chain 2. Work 3 dc in same space.
In each remaining corner space around, work (cl, ch 2, cl).
Join with slip stitch to top of beginning ch-3. Turn.
— 2 clusters along every side.
Round 3
Slip stitch into first corner space.
Work (cl, ch 2, cl) in that corner.
Work 1 cl in each space between clusters along the side.
At the next corner, work (cl, ch 2, cl).
Continue around in the same manner — 1 cl in each space between clusters along each side, and (cl, ch 2, cl) at each corner.
Join and turn.
Continue the Hexagon
Repeat Round 3, adding one additional cluster to every side with each new round.
On every round:
- Work 1 cl in every space between clusters along each side
- Work (cl, ch 2, cl) in every corner space
Continue until one side of the hexagon reaches your Arm Depth measurement.
Complete both hexagons with the same number of rounds.
Note on waviness: If the hexagon becomes wavy or ruffled rather than lying flat, do not try to correct it. This is a natural result of granny hexagon construction and is exactly what you want. The extra fabric folds into the sleeve and body when the pieces are assembled.
Extending the Body
Once both hexagons are complete to your Arm Depth measurement, you stop working around all six sides. From this point forward, you will work back and forth across three consecutive sides only.
These three sides will become:
- One front panel
- The bottom edge
- One back panel
The remaining three sides stay as they are and form the sleeve.
Place stitch markers at the beginning and end of the three sides you will extend to keep track of your working area.
Extension Row 1
Begin at the outer corner of the first marked side.
Chain 3. Work 2 dc in same corner space.
Work 1 cl in every space between clusters along the first side.
At the first internal corner where two sides meet, work (cl, ch 2, cl).
Work 1 cl in every space across the middle side.
At the next internal corner, work (cl, ch 2, cl).
Work across the third side.
Work 1 cl in the final outer corner. Turn.
Extension Row 2
Chain 3.
Work 1 cl in each space between clusters across the first side.
Maintain (cl, ch 2, cl) in each of the two internal corners.
Work across the remaining sides.
Double crochet in top of turning chain. Turn.
Extension Row 3
Chain 3.
Work 2 dc in first available cluster space.
Work 1 cl in each space across.
Maintain (cl, ch 2, cl) in both internal corners.
When 1 space remains at the opposite edge, work 2 dc in that space.
Double crochet in top of turning chain. Turn.
Continue
Repeat Rows 2 and 3, alternating between them.
Every few rows, fold the hexagon loosely into its L shape and check the fit against your Quarter Chest measurement — the distance from the folded center back edge to the outer front edge.
Continue until that distance matches your Quarter Chest measurement.
Finish both hexagons with the same number of extension rows.
Folding the Hexagons
Fold each finished hexagon so that the three sleeve sides meet along a natural fold line. Each piece will collapse naturally into an L shape.
Lay the two folded pieces next to each other as mirror images. You should now be able to identify:
- Two sleeve sections (the folded arms of each L)
- Two front panels
- Two back edges that will meet at the center back
- The bottom edge running across both pieces
Pin everything in place before joining. This step takes a few minutes but saves significant adjustment time later.
Joining the Back
Place the two center-back edges together with wrong sides facing.
Using matching yarn, join them with slip stitches, mattress stitch, or whip stitch — whichever you are most comfortable working. Work from the bottom edge upward toward the neckline.
Fasten off securely and weave in the ends before moving on.
Shoulder and Sleeve Seams
With the cardigan laid flat, line up the upper edges of each folded hexagon.
Leave an opening at the center back for the neckline. As a starting point, leave approximately 3 granny spaces on either side of the center-back seam unjoined to create the neck opening. You can adjust this once the cardigan is on your body.
Pin the shoulder and sleeve edges together on both sides.
Try the cardigan on before making the seams permanent if at all possible. Adjusting the shoulder seam placement at this stage is easy. Adjusting it after seaming is not.
Join each side from the outer sleeve edge toward the neckline. Fasten off and weave in ends on both sides.
Sleeves
Work both sleeves the same way.
Join yarn at the underarm point of one sleeve opening.
Sleeve Round
Chain 3. Work 2 dc in same space.
Work 1 cl in each granny space around the sleeve opening.
Join with slip stitch to top of beginning ch-3. Turn.
Repeat this round until the sleeve measures approximately 3 to 4 inches shorter than your desired finished sleeve length, using your Center Back to Wrist measurement as your guide.
Sleeve Taper
If you prefer a wide, relaxed sleeve, skip this section and proceed directly to the cuff.
For a narrower wrist opening:
Decrease Round 1
Chain 3. Work 2 dc into each granny space around. Join.
Decrease Round 2
Chain 3. Work double crochet around, placing a dc2tog at regular intervals until the sleeve opening fits comfortably around the wrist. End with an even number of stitches for the ribbing. Join.
Decrease Round 3
Chain 3. Double crochet in each stitch around. Join.
Ribbed Cuff
Cuff Round 1
Chain 2.
Front post double crochet around next dc. Back post double crochet around next dc.
Repeat from * to * around. Join.
Cuff Rounds 2 through 7
Repeat Cuff Round 1, always working fpdc around fpdc and bpdc around bpdc to maintain the rib column alignment.
Add or remove rounds depending on how wide you want the finished cuff.
Fasten off. Repeat for the second sleeve.
Adding Body Length
If the cardigan is already long enough based on your Finished Length measurement, skip this section.
With RS facing, join yarn at one lower front corner.
Row 1
Chain 3. Work 2 dc in first space.
Work 1 cl in each granny space across the entire bottom edge, including across the center-back join.
Work 3 dc in the final corner. Turn.
Row 2
Chain 3.
Work 1 cl in each space between clusters across.
Double crochet in top of turning chain. Turn.
Row 3
Chain 3.
Work 2 dc in first space.
Work 1 cl in each space across.
Work 2 dc in final space.
Double crochet in top of turning chain. Turn.
Repeat Rows 2 and 3 until the cardigan reaches your Finished Length measurement.
Front and Neck Edging
Join yarn at one lower front corner.
Edging Round 1
Chain 1.
Work single crochet stitches evenly up the first front edge, continue around the neckline, and work single crochet stitches evenly down the second front edge.
Work across the bottom edge.
Place 3 sc in each lower corner to help the border turn neatly and lie flat.
Join with slip stitch.
Edging Round 2
Chain 1.
Single crochet in each stitch around.
Work 3 sc in each lower corner.
Join and fasten off.
Repeat Edging Round 2 for a wider front band if desired.
Optional Buttons
Sew buttons evenly along one front edge, spacing them to prevent the front from gaping open at the chest. Six to eight buttons work well for most sizes.
The natural spaces in the granny fabric can often serve as buttonholes without any additional work. If you prefer dedicated buttonholes, work them into the final edging round by replacing 2 stitches with a ch-2, sk 2 sts at each button placement point.
Position each button directly opposite its corresponding buttonhole on the other front edge.
Finishing
Weave in all remaining ends securely, running each tail in two directions through the fabric.
Try the cardigan on before final blocking and check the sleeve length, body length, front overlap, and neckline opening. Make any small adjustments now while everything is still easy to access.
Block the finished cardigan gently to even out the granny clusters, open up the stitch pattern, and give the seams a cleaner shape. For acrylic yarn, a light steam block works well. For natural fiber yarn, wet blocking will give the most defined result.
Tips for Working This Pattern Successfully
On the waviness of the hexagon: New crocheters sometimes try to correct the ruffling that appears as the hexagon grows. Do not. That extra fabric is structural — it is what creates the sleeve and body depth when the hexagon is folded. A flat hexagon would not fold correctly.
On checking the fit early: Fold the hexagon into its L shape every five or six rows during the extension stage and hold it up to your body or lay it against your measurements. Catching a sizing issue ten rows in is a minor inconvenience. Catching it after finishing both hexagons is much less enjoyable.
On the center back join: A slip stitch seam worked through both layers with the wrong sides together creates a flat, nearly invisible join that lies well against the body. If you prefer a decorative seam, a surface slip stitch worked on the right side creates a small visible ridge that can be a design feature.
On sleeve length: Work the sleeves slightly shorter than you think you need before adding the cuff. The ribbing adds length, and a sleeve that is too long before the cuff becomes difficult to correct after it.
On color choices: If you are working in multiple colors, change colors at the end of a round rather than mid-round for the cleanest transitions. Carry unused colors up the back of the work to minimize ends.
Final Thoughts
The Crochet Hexagon Cardigan earns its place as a beloved project in the crochet community through a combination of qualities that are genuinely rare in a single pattern: clever construction that is satisfying to understand, meaningful flexibility in sizing and length, and a finished result that looks far more complex than the two-piece assembly it actually is.
It is a pattern that rewards the time you put into it. The early rounds are meditative and quick. The body extension stage is where the garment starts to make sense. The folding and joining moment — when two flat hexagons suddenly look unmistakably like a cardigan — is one of those small crochet triumphs that stays with you.
Make it in one rich color for something classic. Make it in soft neutrals for something quiet and wearable. Make it in every scrap color you have for something joyful and entirely your own.
However you make it, you will likely be reaching for this construction again.