Thick yarn, built-in handles, and a satisfying bottom-up construction — this is the kind of practical project that earns a permanent spot in your home the moment it is finished.
The Crochet Project That Finally Solves the Clutter Problem
Every crocheter has a pile somewhere. Yarn that needs a home. Unfinished projects waiting their turn. Small blankets folded on the floor beside the sofa. Toys that migrate from room to room without ever quite landing anywhere. If any of that sounds familiar, this basket was made for you.
This crochet storage basket is one of those projects that manages to be genuinely useful and genuinely satisfying to make at the same time. It works up quickly in super bulky yarn, holds its shape beautifully once finished, and has built-in handles crocheted directly into the top of the basket — no sewing, no attaching, no extra steps. The bottom-up construction makes the whole process intuitive and easy to follow, even if you have never made a crochet basket before.
The finished basket measures approximately 11 inches in diameter and 9½ inches tall — a generous medium size that is large enough to be practical without taking over a room. It works beautifully as a yarn storage basket, a toy bin, a blanket holder beside the sofa, or a catch-all for the small everyday things that never seem to have a proper place. And because you are making it yourself, you can choose any yarn color that suits the room it is going into.
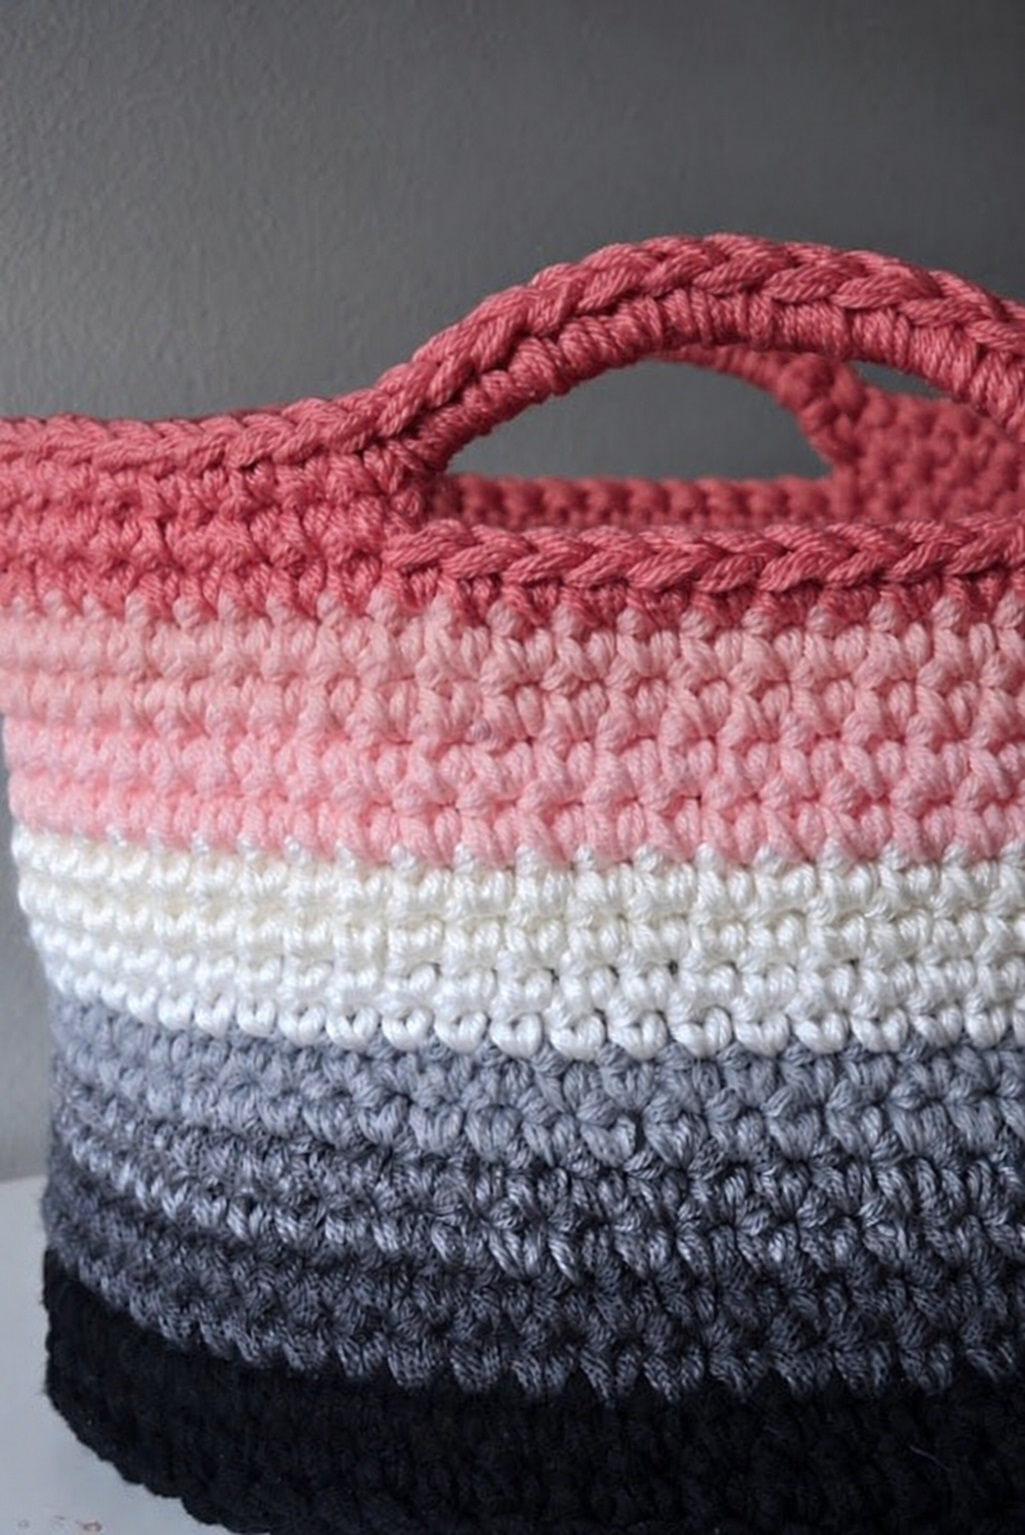
Two basket patterns are included in this post — a super bulky version and a three-strand version that comes in two sizes — along with some helpful tips for making your baskets firmer and more structured. The complete pattern instructions are written out in full below.
At a Glance
| Detail | Specification |
|---|---|
| Finished Size | 11 in (28 cm) diameter x 9½ in (24.5 cm) tall |
| Skill Level | Easy — Beginner Friendly |
| Yarn Weight | Super Bulky (#6) |
| Hook Size | 8 mm (US L/11) |
| Gauge | 8 sc and 8 rows = 4 in (10 cm) |
| Gauge Critical? | Not strictly, but firmer tension helps the basket hold its shape |
Materials
Super bulky weight yarn — approximately 2 balls. The original project uses Bernat Pop! Bulky, which gives the basket a firm structure and a cozy, textured appearance. Any super bulky yarn in a similar weight will work well. Choose something with enough body to hold its shape on its own rather than collapsing when filled.
You will also need an 8 mm (US L/11) crochet hook, a stitch marker, a yarn needle for weaving in ends, and scissors.
A note on gauge: for a basket, a small variation in gauge will not affect the usability of the finished piece. What matters more is keeping your tension reasonably firm throughout so the basket stands upright and holds its shape when filled. If your stitches feel loose or the fabric seems floppy, try moving down half a hook size.
Abbreviations
This pattern uses US crochet terminology throughout.
ch — chain
hdc — half double crochet
sc — single crochet
sl st — slip stitch
st(s) — stitch(es)
rnd — round
BLO — back loop only
One important note before beginning: the ch 2 at the start of each hdc round does not count as a stitch throughout this pattern.
The Pattern — Basket One
Building the Base
Chain 4 and join to the first chain with a slip stitch to form a ring.
Round 1: Chain 2. Work 12 hdc into the ring. Join with a slip stitch to the first hdc. You should have 12 hdc.
Round 2: Chain 2. Work 2 hdc in each stitch around. Join with a slip stitch to the first hdc. You should have 24 hdc.
Round 3: Chain 2. Work 2 hdc in the first stitch. Repeat: 1 hdc in the next stitch, 2 hdc in the following stitch around. Join with a slip stitch to the first hdc. You should have 36 hdc.
Round 4: Chain 2. Work 2 hdc in the first stitch. Repeat: 1 hdc in each of the next 2 stitches, 2 hdc in the next stitch around. Join with a slip stitch. You should have 48 hdc.
Round 5: Chain 2. Work 2 hdc in the first stitch. Repeat: 1 hdc in each of the next 3 stitches, 2 hdc in the next stitch around. Join with a slip stitch. You should have 60 hdc.
Round 6: Chain 2. Work 2 hdc in the first stitch. Work 1 hdc in each of the next 9 stitches, then 2 hdc in the following stitch. Continue spacing the increases evenly around the round. Join with a slip stitch to the first hdc. You should finish with 66 hdc.
At the end of Round 6 your base should look like a neat, flat circle. These six rounds build the circular base through evenly spaced increases that grow the diameter smoothly and evenly with each round.
Starting the Sides
One of the most satisfying moments in basket construction is the transition from the flat base to the vertical sides, and the technique that creates it is beautifully simple. Working one round through the back loops only creates a subtle ridge around the edge of the base and encourages the fabric to fold upward instead of continuing to grow outward. That single round is what gives the basket its clean, defined base edge and its upright structure.
Round 7: Chain 1. Working in the back loops only, make 1 sc in each stitch around. Join with a slip stitch to the first sc. Place a stitch marker at the end of this round. You will use this marked round as your reference point when measuring the height of the basket as you work the sides.
Working the Sides
Round 8: Chain 1. Working through both loops again, make 1 sc in each stitch around. Join with a slip stitch to the first sc.
Repeat Round 8 until the basket measures approximately 8½ inches from the marked round.
This is the most relaxing section of the project. There are no increases, no decreases, no complicated stitch changes — just simple single crochet rounds working upward while the basket slowly grows taller. It is the kind of repetitive, rhythmic work that makes a crochet basket such a pleasant project to work on while watching a film or listening to a podcast. Your hands will find the rhythm quickly and hold it comfortably all the way to the top.
Making the Handles
Once the basket has reached the correct height, the handles are worked directly into the top of the basket in a single round. There is no sewing handles on afterward, no separate pieces to attach, and no finishing to worry about at this stage. The handles grow out of the basket itself, which gives them a strength and neatness that attached handles rarely match.
Handle Round: Chain 1. Work 1 sc in each of the next 23 stitches. Chain 10. Skip the next 10 stitches. Work 1 sc in each of the next 23 stitches. Chain 10. Skip the next 10 stitches. Join with a slip stitch to the first sc. You should now be able to see two handle openings sitting on opposite sides of the basket.
Strengthening the Handles: Chain 1. Work 1 sc in each of the next 23 stitches. Work 1 sc in each of the 10 chains that form the first handle. Work 1 sc in each of the next 23 stitches. Work 1 sc in each of the 10 chains that form the second handle. Join with a slip stitch. This round works single crochet stitches directly over the chain loops, reinforcing each handle and giving it a firm, finished structure.
Finishing the Top
Work 3 more rounds of single crochet, making 1 sc in every stitch around and joining each round with a slip stitch. After the final round, fasten off and weave in all yarn ends securely with a yarn needle.
Your basket is complete — a soft but sturdy crochet basket with built-in handles and a clean, finished top edge, ready to fill with whatever needs a new home.
You can find the printable PDF version of this pattern using the link below.
Download Crochet Storage Basket PDF TUTORIAL
A Second Basket Option — The Color-Block Version
If you love the idea of a crochet basket with a two-tone color-block look, this second pattern is worth bookmarking alongside the first.
Rather than super bulky yarn, this version is worked with three strands of yarn held together throughout the project, which creates a similarly dense and sturdy fabric through a different construction approach. The triple-strand method is a practical option if you have lighter weight yarn you would like to use up, or if you want more control over the color combinations in the finished basket.
This pattern also offers two finished sizes. The small basket measures approximately 8 inches tall with a 30-inch circumference — a compact option that works well in a bathroom, on a bedside table, or in a nursery. The large basket measures approximately 12 inches tall with a 42-inch circumference — a generous size suited to yarn storage, toy bins, or living room organization.
The construction follows the same general approach as the first basket, beginning at the center of the base with single crochet increases, transitioning to back loop only for the first side round to create the base ridge, and then working straight up in regular single crochet until the desired height is reached. The color change near the top of the basket creates the simple, clean two-tone stripe that gives this version its character. Neutral yarn colors — cream and oat, grey and white, tan and natural — work especially well with this style of construction and give the finished basket a look that fits easily into almost any room.
You can find the printable PDF for the second basket using the link below.
How to Make a Crochet Basket Firmer and More Structured
One of the most common questions about crochet baskets is how to stop them from collapsing or losing their shape once they are filled. The answer almost always comes down to yarn choice and tension, and the two basket patterns in this post are a perfect illustration of both approaches.
Yarn weight makes the single biggest difference. A thick, super bulky yarn naturally produces a dense, firm fabric that holds its structure on its own. If you want the same firmness from a lighter weight yarn, holding two or three strands together throughout achieves a very similar result — which is exactly the method used in the second basket pattern. Both approaches work well. The choice between them usually comes down to what yarn you have available and what finished appearance you prefer.
Tension plays an equally important role. A loose crochet fabric produces a basket that is soft but floppy, folding in on itself when filled rather than holding its shape upright. Keeping your tension firm — not uncomfortably tight, but consistently snug — gives the fabric enough structure to stand on its own. If you find your basket is softer than you would like, try working the sides again with a hook one size smaller. The difference is often immediately noticeable.
Using single crochet for the sides is also a deliberate choice in both of these patterns. Single crochet creates a more compact, tightly woven fabric than half double or double crochet, which contributes directly to the basket’s ability to hold its shape. The denser the fabric, the more structure the finished basket will have.
What to Use Your Crochet Basket For
The honest answer is almost anything. A medium basket beside the sofa is the natural home for current crochet projects, yarn in progress, and the small miscellaneous items that accumulate on every coffee table. A smaller basket in the bathroom keeps rolled washcloths or toiletries neat and accessible without taking up counter space. A basket in a nursery holds baby items, soft toys, or small blankets in a way that looks intentional rather than just stored. A craft room basket corrals supplies that would otherwise spread across every available surface.
What makes a handmade basket different from a purchased one is exactly that it can be made to match. Choose yarn in a color that already lives in the room, and a simple storage solution suddenly feels like a considered part of the space. That is one of the quiet pleasures of making practical things — the everyday objects around you start to reflect the time and care you put into them.
A Final Word
There is something particularly satisfying about a crochet project that solves a real problem and looks good doing it. This basket is simple enough to be genuinely relaxing to make, structured enough to actually hold its shape when finished, and versatile enough to find a useful place in almost every room of the house.
Make one for your yarn stash, another for the living room, and then see how long it takes before you are planning one for every corner of the house. The stitches are simple. The construction is logical. And the finished result is the kind of thing you will reach for every single day.