A small, textured holiday decoration worked in simple stitches — perfect for ornaments, garlands, gift tags, and handmade holiday gifting.
The Holiday Project That Uses Up Your Yarn Scraps Beautifully
There is something particularly satisfying about a seasonal project that is small enough to finish in a single evening and pretty enough to give as a gift the very next day. This crochet Christmas tree ornament is exactly that kind of project.
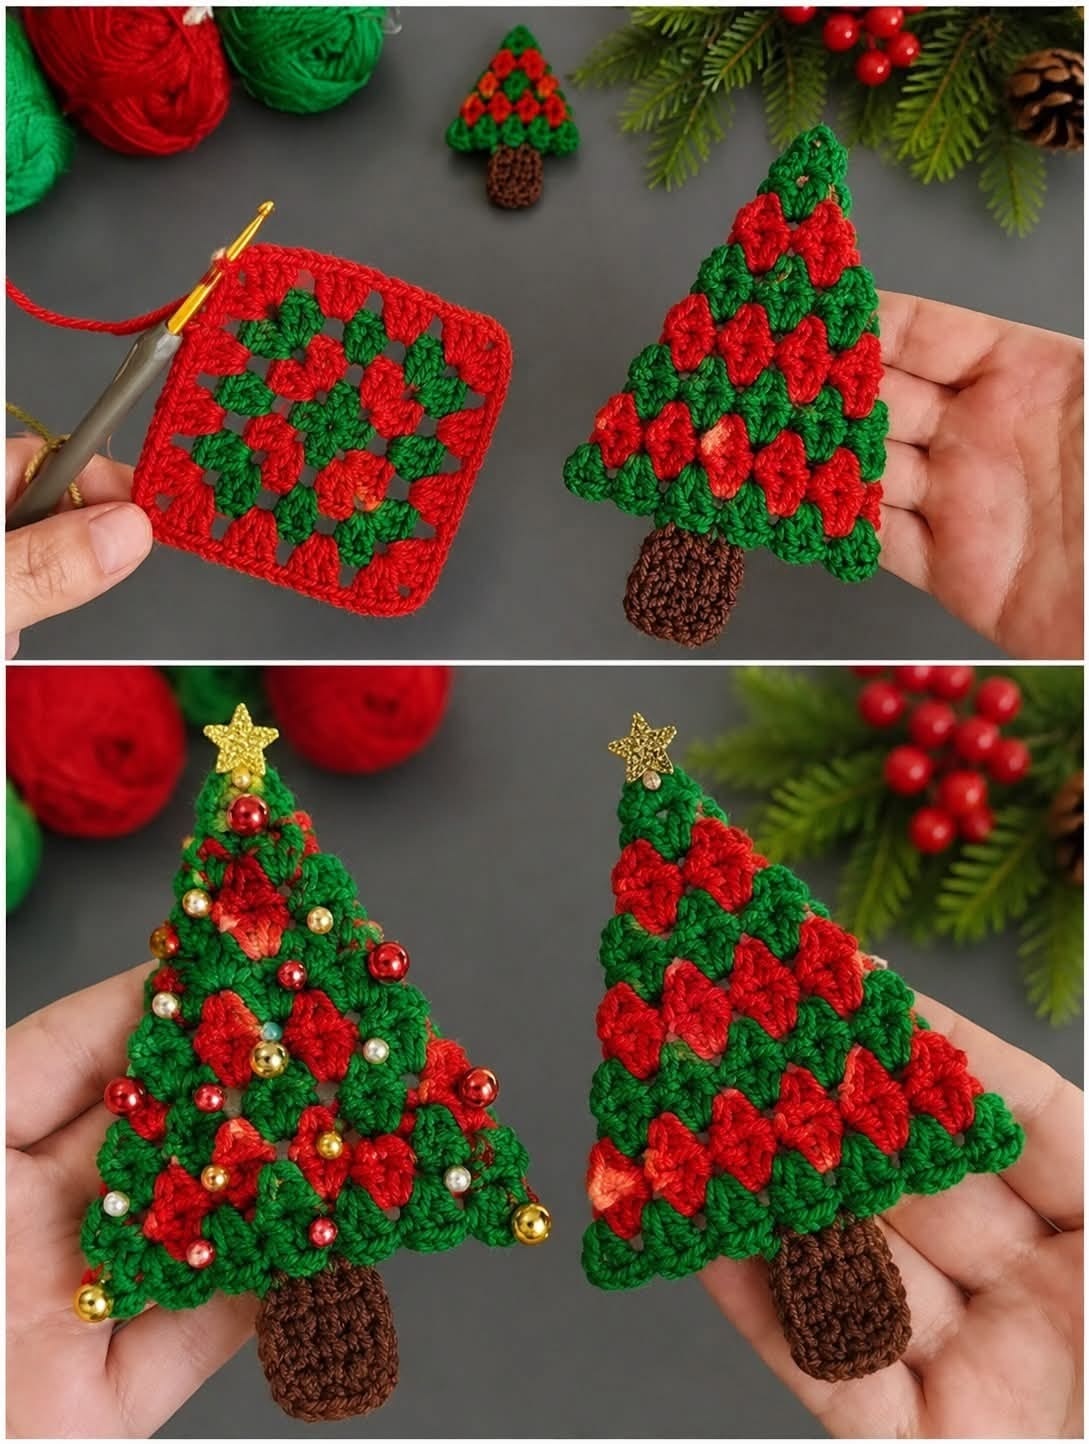
The tree is worked in simple rows that gradually build a small triangle shape, decorated with bobble-style clusters in red and green that give the surface a playful, textured appearance. A short brown trunk anchors the base, a small star finishes the top, and a looped yarn hanger turns the whole thing into a ready-to-hang ornament in minutes. The pattern is beginner-friendly, uses only a small amount of yarn in three colors, and can be scaled up or down simply by adding or removing rows.
Make one as a tree ornament, several in a row for a garland, or a small stack as handmade gift tags. The complete pattern is written out in full below.
Materials
Green worsted weight yarn — main color for the tree body
Red worsted weight yarn — for the decorative clusters
Brown worsted weight yarn — for the trunk
3.5 mm crochet hook
Yarn needle
Scissors
Small beads, buttons, or sequins (optional, for extra decoration)
A small star charm, button, or crocheted star for the top
A small piece of cardboard for blocking, if desired
This is an ideal project for using up leftover yarn from other projects. Any worsted weight yarn in your chosen colors will work well. The finished size is determined by the number of rows you work rather than a fixed measurement, so the yarn quantities are flexible.
Abbreviations
This pattern uses US crochet terminology.
ch — chain
sc — single crochet
hdc — half double crochet
dc — double crochet
sl st — slip stitch
st — stitch
Finished Size
The finished size depends on your yarn, hook size, and the number of rows worked. For a small ornament suitable for hanging on a tree, work approximately 12 to 15 rows. For a larger decorative piece, continue adding rows until the tree reaches your preferred size. The triangle shape builds naturally with each pair of rows, so you can stop at any point that looks right to you.
The Pattern
Tree Body
With green yarn, chain 2.
Row 1: Work 3 sc into the 2nd chain from the hook. Turn. You should have 3 stitches.
Row 2: Chain 1. Work 2 sc in the first stitch, sc in the next stitch, 2 sc in the last stitch. Turn. You should have 5 stitches.
Row 3: Chain 1. Single crochet in each stitch across. Turn.
Row 4: Chain 1. Work 2 sc in the first stitch, sc across to the last stitch, 2 sc in the last stitch. Turn. You should have 7 stitches.
Row 5: Chain 1. Single crochet in each stitch across. Turn.
Continue alternating between an increase row (working 2 sc in the first and last stitch with sc across the middle) and a plain row (sc across all stitches) until the tree reaches your desired size. The piece will gradually form a neat triangle as the rows build up. When the tree is the size you want, fasten off and weave in the end.
A note on sizing: for a small ornament, stopping at Row 12 or Row 13 gives you a compact, neat triangle that hangs well on a tree. For a larger decoration intended for a mantel or wreath, continuing to Row 18 or Row 20 produces a more substantial piece with more surface area for decorations.
Adding the Textured Clusters
The decorative clusters are what give this ornament its character. They are worked directly into the surface of the finished tree body after the main piece is complete, so you can place them exactly where you want them rather than planning their position in advance.
To make each cluster, insert your hook into the position on the tree where you want the decoration to sit. Work 3 double crochets into that same stitch. Remove the hook from the working loop. Insert the hook back through the top of the first double crochet you worked. Pick up the dropped loop and pull it through. Chain 1 to secure. The cluster is complete.
Work several red clusters randomly across the surface of the green tree, spacing them so that a comfortable amount of green shows between each one. The contrast between the red bobbles and the green background is what gives the ornament its festive, decorated-tree appearance. If you want additional visual interest, add a few clusters in a second shade of green — a slightly darker or lighter tone works well — scattered between the red ones to suggest foliage depth.
There is no fixed number of clusters required. Work as many or as few as looks balanced to you, keeping in mind that leaving some green space between them allows each cluster to stand out clearly.
Trunk
With brown yarn, chain 7.
Row 1: Single crochet in the 2nd chain from the hook and in each chain across. You should have 6 stitches.
Rows 2 through 5: Chain 1, turn. Single crochet in each stitch across.
Fasten off and leave a long yarn tail for sewing. If you want a slightly thicker trunk, fold the finished piece in half lengthwise before attaching it to the tree.
Attaching the Trunk
Place the brown trunk piece behind the bottom center edge of the completed tree body. Using the long yarn tail and your yarn needle, sew the trunk securely to the back of the tree. Weave in any remaining ends once the trunk is firmly attached.
Adding the Star
A small decoration at the top of the tree gives the ornament a polished, finished look. You can use a small wooden star, a metal charm, a felt star cut from scrap fabric, a ready-made Christmas decoration, or a small crocheted star if you want to keep the whole project in yarn. Attach it securely to the top point of the triangle using your yarn needle or a few drops of craft glue, depending on the material.
Optional Additional Decorations
If you want to add more detail to the tree surface beyond the crochet clusters, small beads, pearl beads, gold beads, tiny buttons, sequins, or mini pom-poms all work beautifully sewn directly onto the green body. Scatter them randomly across the surface alongside or instead of the crochet clusters. This step is entirely optional — the clusters alone give the ornament plenty of visual interest — but for a more elaborate or sparkly result, a few carefully placed beads can make a noticeable difference.
Hanging Loop
To turn the tree into a hanging ornament, cut approximately 8 inches (20 cm) of yarn in any color. Fold it in half and tie the two ends together to form a small loop. Sew or knot the loop securely to the top point of the tree, just behind the star, so that the ornament hangs evenly when suspended from a branch.
Optional Blocking
If you want the finished ornament to have a crisper, firmer shape, place it on a small piece of cardboard and pin it gently into its triangle shape while damp, then allow it to dry completely before removing the pins. You can also apply a small amount of fabric stiffener to the back of the piece and allow it to dry flat. Either method produces a more structured result that holds its shape well on the tree. Complete the blocking before attaching any beads or non-yarn decorations.
Color Variations
The same pattern works beautifully in a wide range of color combinations. Green and red gives the classic Christmas tree look that suits a traditional holiday decorating style. Green and gold creates a more elegant, contemporary result that works well on a neutral or modern tree. White and silver gives a wintery, frost-inspired appearance. Pastel colors — pale pink, soft mint, light lavender — produce a softer, more whimsical decoration suited to a children’s room or a lighter holiday palette. Red and white together creates something that leans more toward candy-cane territory and is particularly appealing as a gift tag or stocking decoration.
You can also make several trees in graduating sizes — a small one, a medium one, and a larger one worked to different row counts — and string them together on a length of yarn or twine to create a simple, handmade Christmas garland.
Final Thoughts
This crochet Christmas tree ornament is the kind of small project that rewards an evening of making with something genuinely useful and genuinely pretty. The stitches are simple enough for a beginner, the customization options are broad enough to keep an experienced crocheter interested, and the finished result is charming enough to give with real confidence.
Make a few in an afternoon. Hang them on the tree, tuck them into gift boxes, or string them into a garland. They are small enough to make in quantity and personal enough to feel like something special.